Lifestyle

How to Create a DIY Hula Hoop Photo Display

Looking for fun and creative ways to display pictures for your family, birthday parties, bridal showers, maternity display, graduation parties, theme parties, weddings or even as a gift to your friends? I think Hula Hoop Photo Display is a great way to instantly add to the decor while also compiling your favorite memories. I created a beautiful Hula Hoop Photo Display recently for my husbands birthday.

Materials Needed

A Hula Hoop (There are 2 sizes available – I got the slightly smaller one but you can pick any)

White Spray Paint (Any color of your choice. If you are planning to display for your wedding gold would be a great color option too to add some glitz and glam)

White Satin Ribbon

Faux flowers

Faux greenery/leaves

Hot glue Gun

A small wooden Block (Optional – If you want to make it stand)

Pictures (I printed ours using the Printic App)

Scissors

Directions

Step 1: Shortlist the pictures from your phone or social media which you would like to use for creating this beautiful photo display and send them for printing. I got mine printed using the Printic App. All you need to do is select the pictures you want to print and they will pop and print polaroid type pictures for you and send them in your mail. They did a fantastic job and I was extremely happy with the quality. If you want you can even have them edited to a black and white version for a more vintage look on photoshop before getting them printed. You can also print these yourself on Photo Paper if you like too.

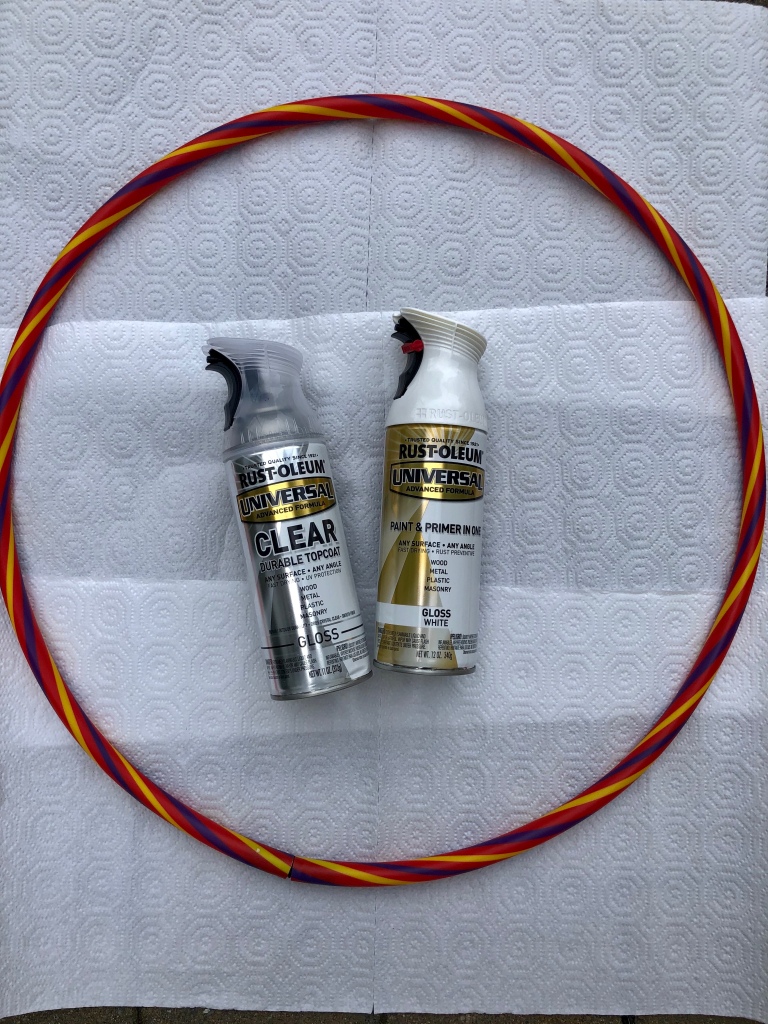
Step 2: Next I took my Hula Hoop and wooden block and spray painted it white in a ventilated area. I gave them around 2 to 3 coats to ensure they were completely covered. I also coated them with a topcoat to seal the paint. You may skip this step if you like but I highly recommend it. Set them aside to dry completely. I kept them to dry completely for 24 hours. I did it in the summertime so it dried fairly quickly.

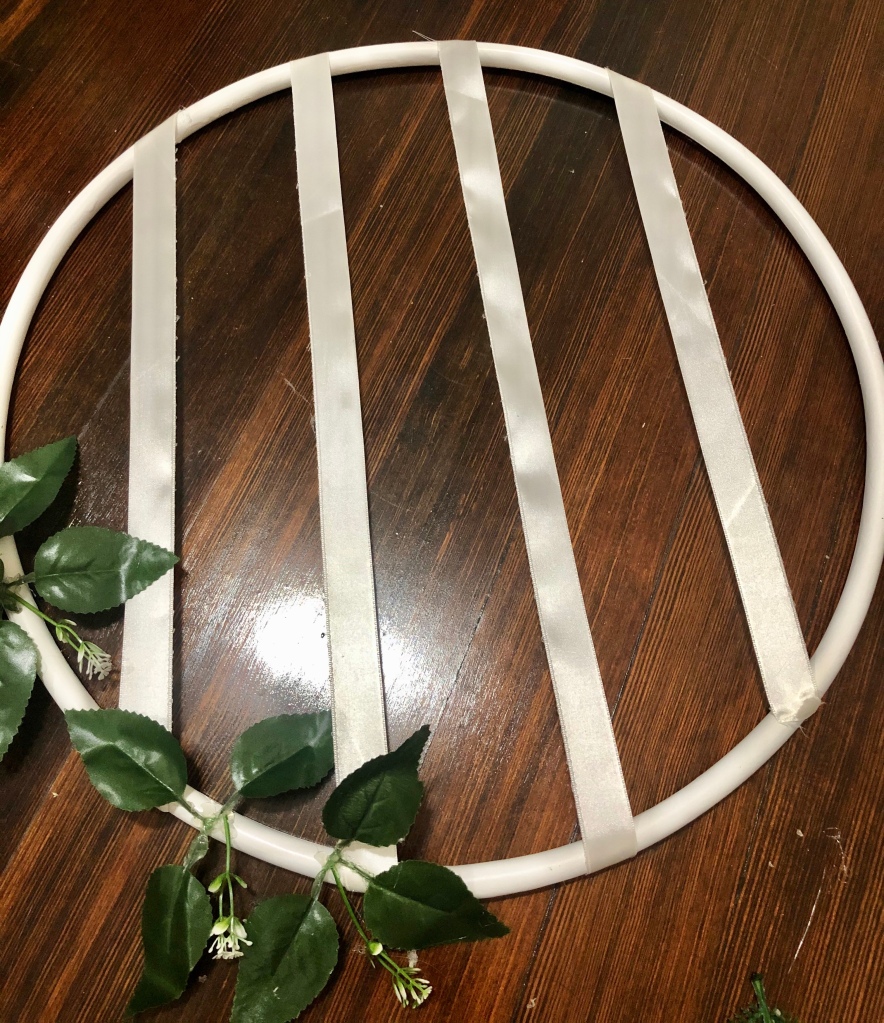
Step 3: Once they have completely dried, I cut 4 satin ribbons measuring the hula hoop and where they will be placed and secured them with a glue gun. If your pictures are fairly smaller than mine you can add a thinner satin ribbon too and add more ribbons to add more pictures. This is completely your choice. I started with cutting and sticking the center ribbon to be as symmetrical as possible.

Step 4: Next, I started to add the faux greenery. I first laid them out to decide how I wanted them by laying the leaves first and adding some faux flowers and faux buds around it. Once I was happy with the arrangement I secured everything with a hot glue gun. You can add as many or ass little of the faux greenery or faux flowers as you like. Remember to add enough hot glue to secure everything in its place.

Step 5: While everything was drying, I started laying the pictures on the satin ribbon until I was happy with the display arrangement and then secured them with a glue gun.

Step 6: Finally, I took the Hula Hoop Photo display and using a hot glue gun stuck it to the wooden block. Remember to hold it for a couple of minutes to give it support until the glue dries and can hold it easily. Ensure to apply enough hot glue in order to secure it in place. If you wish to hang them you can easily hand them too using ribbons and skipping the wooden block.

Hope you enjoy creating your personalized Hula Hoop Photo Display. If you do create one using the directions feel free to share it with me. I will be happy to see what you come up with.

Lifestyle

10 Ideas to Celebrate Mothers Day during Social Distancing

With the pandemic going strong we are all feeling a little strange and missing our families but lets not get it in the way to express our love to our loved ones this Mothers day. Make your mom, grandmom and newly minted moms feel special with these small gestures that will go a long way.

  1. Cook her Breakfast in Bed – If you live with her you can prepare her favorite breakfast and coffee and start the day on the right note by pampering her.

2. Watch a Mother Daughter Movie Together – Even if you are not living together you can easily block a time of the day which works for both of you and watch a movie together and Netflix makes it possible with Netflix Party. Some fun movies to watch are Little Women, Monster in Law, Dumplin, Mamma Mia, I Don’t know How she Does it, etc.

3. Take an Online Cooking Class together – Sign up for an online cooking class of your liking and learn to cook something new together. Whether you have always been wanting to take a speciality class or cook a meal from scratch go for it.

4. Host a Virtual Happy Hour on Zoom – Set aside time and using zoom or any video conferencing app tune in to your favorite concert, play games or simply chat your hearts away while sipping on some cocktails or mocktails of your choice.

5. Take a Virtual Fitness Class together – Sign up for a Virtual fitness class together of your choice be it yoga, mat pilates, cardio or even dance and sweat it together.

6. Create a Slideshow for Mothers Day – You can create a fun slideshow for Mothers’s Day and share it with her. It can include pictures from your childhood and messages from her loved ones thanking her or saying something beautiful to appreciate her. It will be a beautiful memory she can cherish forever.

7. Send her an Ecard – You can create your own ECard using any of the free apps available with messages from her loved ones or even a small poem to appreciate her and make her feel special.

8. Create a Video – One of the easiest things to do is you can ask all your siblings or all the loved ones to send a personal message for her and combine it together and share it with her. She will definitely admire the gesture and feel special.

9. Plan a Surprise Dinner for Her – You can always plan a special surprise dinner for her and cook all her favorite things from appetizers, mains and dessert. And off course don’t forget to get her favorite drink. If you have extra time on hand you can also decorate the dining area to add a personal touch.

10. Send Her a Thoughtful Care Package – If you cannot be with her and cannot do anything of the above you can always send her a thoughtful care package to let her know you are thinking of her and really appreciate everything she does for you. Will definitely bring a smile to her face.

If you are looking for Gifts Ideas on Mother’s Day check this post. I have written an entire post on fun gift ideas on a budget. There is something for everyone!

Lifestyle

DIY Sunshine Vase – In less than 30 Minutes

Spring is finally here and I cannot get enough of flowers and plants. Especially in these times when we spend more time at home, color and greenery immediately uplifts me and makes me feel happier. I had some supplies at home and decided to use them to create a sunshine vase. Sharing this super easy and quick DIY with you.

Materials Needed

— Pearl Stickers

— Spray Paint of your choice (I used Yellow Gloss)

— Durable Topcoat (I used Gloss)

— Clear Glass Bowl

— Faux Flowers/Real Plants or Flowers

I got all my materials from Michaels and they are still doing delivery.

Directions

The first thing I did is washed the clear bowl with warm soapy water to ensure that there are no prints on it.

Next I took the pearl stickers and stuck them on the clear glass bowl in the design or pattern I wanted. I created a diamond shaped pattern. The pearl stickers do not need any additional adhesive to stick that what is already on them which makes it really easy for anyone to do including kids with minimal materials.

Once the pearl stickers were applied, I took the glass bowl outdoors to spray paint in a well ventilated area and spray painted the entire glass bowl yellow turning the glass bowl upside down for easier application.

You can keep adding coats of spray paint as long as you get the desired color. Just remember to keep an interval of at least 15 minutes between each coat.

Lastly, seal it with a topcoat of your choice – gloss or matte. And let your vase dry for a minimum of 24 hours.

Once the vase has dried add faux/real plants or Flowers and add them anywhere in your house. I ordered some Tulips with my groceries and added them to add a touch of spring. After all, what says Spring more than Yellow + Tulips.

Hope you enjoyed this easy DIY and have fun creating it!!

Lifestyle

DIY Plant Pots in less than 30 minutes

I love the versatility of terra cotta plant pots especially since there are so many easy ways you can turn a simple pot into a work of art. I have been looking to add some plants inside the house to add a fresh look to the house and adding some character. I love succulents as they require minimal care and and work both indoors and outdoors. For this project however I am going to use faux succulents but you can easily replace them with real plants.

Material Needed:

  • Terra Cotta Pot
  • A paint Brush/ Sponge Brush
  • Paint Palette
  • Faux Succulents/ Real Succulents and Dirt or any other plants
  • Craft smart – Premium Chalky Acrylic Paint (2 colors- Linen and Rich Brown)
  • Thick White Paper (to keep your workspace clean)

Step 1: Working on the thick white paper, using the linen chalky paint start dabbing your terra cotta pot with paint all over using a paint brush or a sponge brush. Do not just simply run smooth strokes like you would paint instead apply paint by dabbing on the pot to give it some texture.

Step 2: Then to give it a more weathered effect just take very little Rich brown Chalky Acrylic paint and start dabbing it on the pot with your paint brush. Keep dabbing it till you get a look you are looking for. You can give it a very vintage look or keep it slightly vintage.

Step 3: If you feel like you have excess of the Rich brown chalky acrylic paint making it look more vintage than you like then redo step 1 at spots that need any corrections.

Step 4: Also paint the inside of the pots that the brown color of the terra cotta pot is not seen even when you place your succulents. Use the linen chalky color to paint the same. You can paint half of the inside or the whole inside pot as required.

Step 5: For real plants put a dish below and you can plant your succulents adding dirt or for faux plants I just added stones to stuff the pot and decorated the pot with the faux succulents.

Step 6: You can make just one and use it as a centerpiece or make 3 of the same kind and use as a centerpiece to decorate your dining table or any other space you like.

These pots are really easy to make and can be a great project to do along with your kids or friends. They are also a great idea for gifts to bridesmaids, to say thank you or even to add to a hamper for all succulent lovers. A great part about them is that I can easily move them to other parts of our home and they are an inexpensive way to add some character to the house. I can easily remove the faux succulents and use them in other containers. It is also a great idea for staging your house for a sale. The possibilities are endless. I can’t wait to see what you come up with!