Have you ever wanted to create a Vision Board ? Or thought about what all the buzz about the Vision board is ? Well I created them since I was a kid but then I did it for pictures of friends and family back then.
Personally, if you ask me I am a visual person and I feel creating a space that displays all the intentions and goals of what I want to achieve in the upcoming year really helps me stay on track. It is a lift me up for me personally as the Vision board is basically a visualization tool used by building a collage of pictures and words for your aspirations and goals. I am a goals person over a resolution person as I find it more achievable and realistic and the Vision Board works like a charm for me.
Before I started making a Vision board, I listed all my goals small or big after reflecting on what I would like to accomplish by the end of the year. This takes time and thought but once this is done I feel the fun process begins.
Then, I looked for pictures, power words, quotes, objects that illustrated my goals and also inspired me to make my Vision Board. Books, magazines, cards, even searching online are all great places to find them. I created my own sketches of power words so literally there is no right or wrong. Create or pick what inspires or motivates you.
Next, I used a sturdy poster board and started placing all my final pictures, power words, quotes, objects, etc in a way which spoke to me. I did not glue anything first until I was sure how I wanted to place everything. Once I was happy with the alignment I glued it all using a gluestick. It never hurts to have more pictures than you actually need in fact it gives you enough options to pick the images you feel resonate the most with the goals you are striving for.
I created one Vision Board for all my goals such as travel, learning skills, personal growth, career, relationships, health, self-care, etc however you can always create separate Vision boards for different goals as well. You can add other goals like buying a house, being debt free, home improvements, losing weight, a new car, saving money, etc. The options are endless. I highly recommend keeping the Vision Board at a place you can see it daily to remind you of your goals and stay on track.
If you are a social butterfly you can totally host a Vision Board creating party where you can get together with friends and family and create your own Vision Boards as well.
Most importantly have fun with creating it and be true to your goals and aspirations and not fall under the trap of what others do or buzz words. The purpose of the Vision Board is to bring everything on it to life.
Hope you enjoy creating your vision board as much as I do! If you do create it please share your creations with me I would love to see what you come up with!!!
Looking for fun and creative ways to display pictures for your family, birthday parties, bridal showers, maternity display, graduation parties, theme parties, weddings or even as a gift to your friends? I think Hula Hoop Photo Display is a great way to instantly add to the decor while also compiling your favorite memories. I created a beautiful Hula Hoop Photo Display recently for my husbands birthday.
Materials Needed
A Hula Hoop (There are 2 sizes available – I got the slightly smaller one but you can pick any)
White Spray Paint (Any color of your choice. If you are planning to display for your wedding gold would be a great color option too to add some glitz and glam)
White Satin Ribbon
Faux flowers
Faux greenery/leaves
Hot glue Gun
A small wooden Block (Optional – If you want to make it stand)
Pictures (I printed ours using the Printic App)
Scissors
Directions
Step 1: Shortlist the pictures from your phone or social media which you would like to use for creating this beautiful photo display and send them for printing. I got mine printed using the Printic App. All you need to do is select the pictures you want to print and they will pop and print polaroid type pictures for you and send them in your mail. They did a fantastic job and I was extremely happy with the quality. If you want you can even have them edited to a black and white version for a more vintage look on photoshop before getting them printed. You can also print these yourself on Photo Paper if you like too.
Step 2: Next I took my Hula Hoop and wooden block and spray painted it white in a ventilated area. I gave them around 2 to 3 coats to ensure they were completely covered. I also coated them with a topcoat to seal the paint. You may skip this step if you like but I highly recommend it. Set them aside to dry completely. I kept them to dry completely for 24 hours. I did it in the summertime so it dried fairly quickly.
Step 3: Once they have completely dried, I cut 4 satin ribbons measuring the hula hoop and where they will be placed and secured them with a glue gun. If your pictures are fairly smaller than mine you can add a thinner satin ribbon too and add more ribbons to add more pictures. This is completely your choice. I started with cutting and sticking the center ribbon to be as symmetrical as possible.
Step 4: Next, I started to add the faux greenery. I first laid them out to decide how I wanted them by laying the leaves first and adding some faux flowers and faux buds around it. Once I was happy with the arrangement I secured everything with a hot glue gun. You can add as many or ass little of the faux greenery or faux flowers as you like. Remember to add enough hot glue to secure everything in its place.
Step 5: While everything was drying, I started laying the pictures on the satin ribbon until I was happy with the display arrangement and then secured them with a glue gun.
Step 6: Finally, I took the Hula Hoop Photo display and using a hot glue gun stuck it to the wooden block. Remember to hold it for a couple of minutes to give it support until the glue dries and can hold it easily. Ensure to apply enough hot glue in order to secure it in place. If you wish to hang them you can easily hand them too using ribbons and skipping the wooden block.
Hope you enjoy creating your personalized Hula Hoop Photo Display. If you do create one using the directions feel free to share it with me. I will be happy to see what you come up with.
After our trip to Amsterdam and actually visiting some breweries my husband and I were intrigued about someday brewing our own beer however always pushed it back. During the quarantine we finally decided to give it a try and become beer brewers from beer drinkers.
Since we are not experts at it we googled and looked for options and finally decided to order the Craft A Brew Kit from Amazon which had great reviews. We personally like Hefeweizen so got that kit but they definitely offer more options such as Pale Ale, Irish Scout, Brown Ale, IPA, Oktoberfest Ale, Ciders and many more options to pick from depending on your liking.
The kit includes a 1 gallon carboy, thermometer, sanitizer, yeast, hops, dry malt extract, speciality grains, grain steeping bag, airlock, rubber stopper, funnel, transfer tubing, racking cane, a tube clamp and a guide to craft brewing. A good thing about this kit is that all the equipments are reusable if you plan to brew beer again and all you need to get is the ingredients i.e Dry Malt Extract, yeast, speciality grains, hops, yeast, sanitizer and a grain steeping bag.
Additionally you need a large brew pot (link to the brew pot we used), around 10 Lbs of Ice, 10 to 12 Swing top bottles (or 4 big swing top bottles) and a fine mesh strainer (optional but recommended).
The guide to craft brewing included with the kit lists down all the steps in a clear and precise manner making it so easy to brew the beer even for beginners. It was our first time too but the instructions and very explicit and also they have many You Tube videos in case you need more clarity or don’t understand a particular step. Also, if you run into some questions which cannot be answered by viewing the videos you can always reach out to the brewmaster and they respond back with answers.
The Process consists of 6 steps :
Step 1: Brewing – This is the first step and one of the steps where you will spend most of your time. We took around 4 hours to complete this step but had a great time brewing our own beer. The guide has detailed instructions about this step and below are some of the pictures for this step.
Step 3 : Sanitization – This is one of the most important step to brewing and will determine if you get great tasting beer or terrible tasting beer. So be sure to follow this step exactly as stated in the guide.
Step 3 : Fermentation – Once we completed brewing our beer, we filled it in the sanitized carboy and plugged it with a rubber stopper and made a blow off assembly inserting one end of the tube in the rubber stopper and the other end into a half full glass of water. It is essential to store in a dark cool place for the fermentation process to commence. After a few days once the fermentation calms you can use the airlock. This whole process takes around 2 weeks.
Step 4 : Carbonation and Bottling – After 2 weeks of the fermentation process we were looking forward to the bottling process. We used the swing top bottles for this process and yet again sanitization is key to this process. In this process we reactivated the remaining yeast using sugar as fuel to carbonate the beer once bottled. Once that step is done we siphoned the beer from the carboy to a pot using the racking cane, clamp and a tube and then yet again to the bottles from the large pot as per the instructions mentioned in the guide. This process took us about 1.5 hours to complete. I am not going to lie we did get a little curious as to how the beer was tasting and tried a sip before the process of carbonation.We kept the bottled beer back in a warm dark place for another 2 weeks to allow the beer to carbonate and condition.
Step 5: Enjoy – After 2 weeks we got our home-brewed beer ready to drink. We were really happy to see the carbonation process work and the beer tasted absolutely amazing. We went all out and even designed our own Beer Labels and came up with a name for our Beer too. Clearly, we were over excited that the beer turned out so good and all the hard work paid off. We are left with our last Beer bottle now and already planning to brew our next batch by adding a twist to it.
This can be a great date night idea or even a fun activity for a family or friends to do together to spend time bonding with each other while also enjoying the rewards at the end of the brewing process. After all what’s better than a cold beer on a hot summer night ?
I would love to hear about your beer brewing experiences. Feel free to share them with me. Happy Brewing!
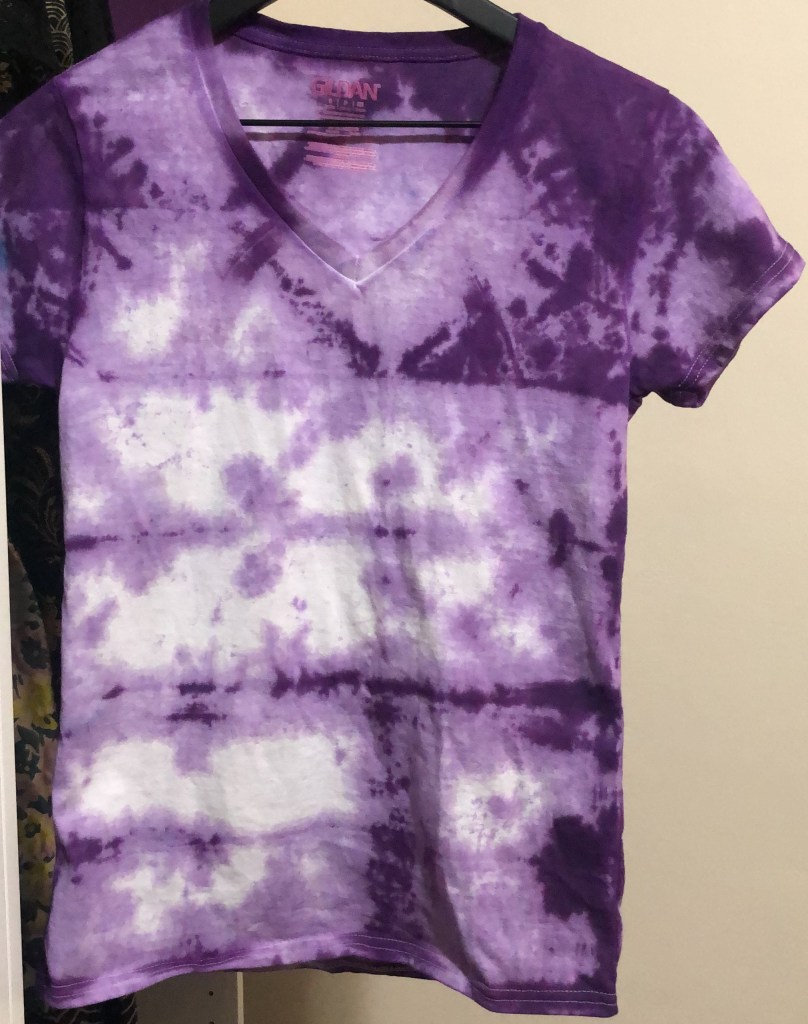
The Tie – Dye trend is strong this season and I am totally here for it. I am not going to lie when I saw this 70’s trend making its comeback I had my doubts but I am loving how easy it is to style it and add a pop of color to the wardrobe.
What was once only a school arts and crafts project is now making a serious comeback. The new trend has been embraced both on and off the runways in a more elevated and fashion forward way. It is one of those trends that quickly moved from the runways to the streets.
The new elevated Tie- Dye trend feels bohemian but tailored and nostalgic but contemporary. What I love most about this trend is how easily accessible it is and so many different ways to style it. The Tie – Dye trend today is not restricted to t-shirts alone but is seen on jackets, coats, jumpsuits, dresses, swimsuits, skirts, scarves, bags, shoes, bedsheets, pillow covers, cushions, and so much more. The options are endless.
This trend has literally something for everyone. If you find the loud colors not your style I highly recommend going for muted colors to tailor this trend to suit your requirements.
And the best thing is you can even DIY if you are looking for a fun project. It is easy, fun and can we done by anyone kids as well as adults. My husband and I created our own Tie- Dye T-shirts (His and Hers) and a baseball cap as a part of a date night idea where we got messy and had some fun. I am going to try doing a few other things as well. These are fresh out of the dryer so haven’t ironed them yet.
We used this Tie – Dye Kit which includes 12 squeeze bottles contains dyes, 16 protective gloves, 40 rubber bands, a reusable surface cover and a project guide. Since this kit already has bottled pre filled with powdered dyes all you need to do is add water to the bottles and shake to mix it up making it super easy. This kit can dye upto 36 projects. There are many small kits available too for someone who is looking for only a project or two. The best thing about this kit is it includes all the essentials you need to get creative and create unique pieces and it works on cotton, rayon as well as silk. Additionally, you will need a white t-shirt (got ours from Michaels) or any other fabric you are dying, plastic bags (to keep the tie-dyed fabric in place without disturbing it for the fabric to pick up the dye colors).
Happy experimenting and having a fun time! Feel free to share your Tie- Dye DIY projects or fun tie dye ideas with me.
Social Distancing and staying at home has definitely taken me back to my old days where I made it a point to remove at least sometime to do the things I really enjoyed. Reading is one of those things for me and I cannot get enough of it. In these uncertain times I find normalcy in books and love how I switch off from everything happening around in the world for sometime.
Here is a list of books I have been reading. Would love to hear from you guys about books you have been reading and would suggest reading.
Normal People – I decided to pick up reading this book only after the adapted show came up on television (Hulu). I find this book extremely well written, compelling and enthralling though I think you will either really enjoy the book or hate it. There is no in-between with this book. This book touches on so many important things and there is so much to analyze in the class differences, first loves, friendship, physical abuses and family dynamics explored here with nuanced skill. This is a coming of age story.
2. American Dirt – This book has definitely received mixed reception. This novel is about a Mexican woman who has to leave behind her life along with her son and escape to the United States as an undocumented immigrant. This book has controversy written all over it but when read as pure fiction I found it absolutely engaging. I think it is one book you have to pick up yourself and decide if you like it or not. For me, I found the story chilling, tense and gripping.
3. Ask again yes – This book grabbed my attention from the first page and never let it go. A powerful, thought provoking beautifully crafted family drama that explores love, forgiveness and the ability to move on. This book is well written and the writing has great depth and complexity to it and the story flows effortlessly. This is the first book I read of this author and absolutely enjoyed it. A great read.
4. There There – I got this book a while ago planning to read. This is the authors debut novel and a strong and powerful one at that. Beautifully written, creatively and skillfully structured with the stories of multiple characters, each one important and affecting on their own, but when meshed the connections that unfold blew me away. This story is told from 12 widely different perspectives of Native communities from Oakland, California in a way which is both exciting as well as heartbreaking. A gripping read.
I love how candles instantly make your house look cozy and add the same time add the perfect ambiance to any room. They are a great addition to coffee tables, book shelves, mantel, in the dining room as centerpieces, or also in the bedroom.
Today, I wanted to share with you a quick and easy DIY Candle holder which can add to the decor of the house. You can easily make as many of them to use as centerpieces on the dining table or as you please.
Materials Needed:
Tumbling Tower Game (A mini one)
Black Spray Paint
Sand
Cylinder Glass
Wood Glue
Led Candle – Pick one that fits inside the cylinder glass.
Directions
The first thing I did is washed the clear bowl with warm soapy water to ensure that there are no prints on it and remove any stickers.
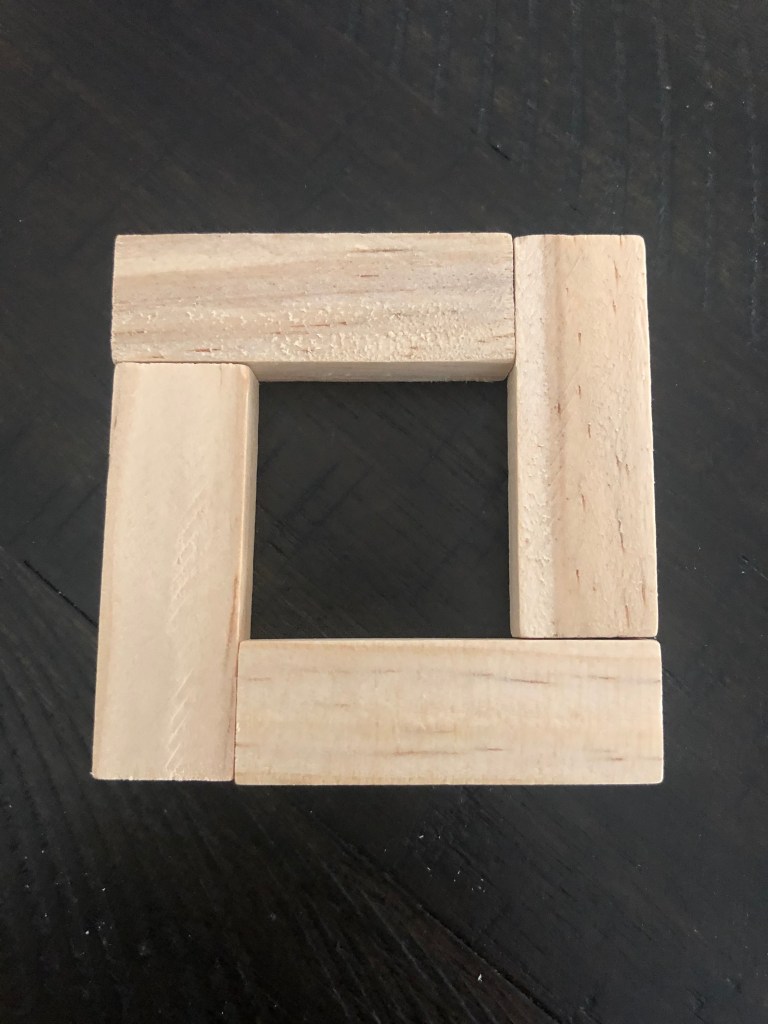
Next, I took 4 tumbling tower pieces and using the wood glue stuck them forming a square as per the photo below.
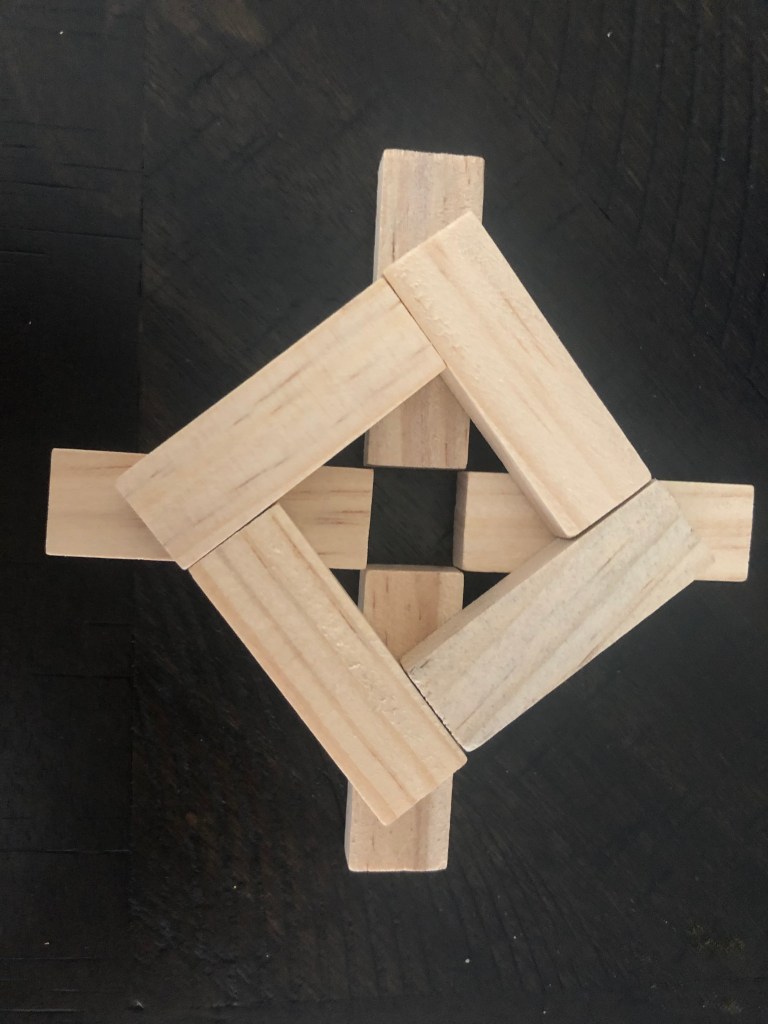
Later I took another 4 tumbling tower pieces and created a cross sign as per the below pictures.
Once you have created the cross sign add some wood glue to the centre of each tumbling tower piece of the cross and stick the square created above diagonally on it as per the picture below.
Once you are done with this, you will need 4 more tumbling tower pieces and stick each vertically on the edges as the below picture using wood glue.
Let it dry for sometime and spray paint the entire piece using a black spray paint in a well ventilated area. Do not miss to spray paint the sides. Let it dry completely.
Once the holder is dry, simply add some sand to the cylinder glass and place the LED candle inside it. It is ready to use.
Thank you for visiting the blog today and hope you enjoy creating this DIY Candle Holder.
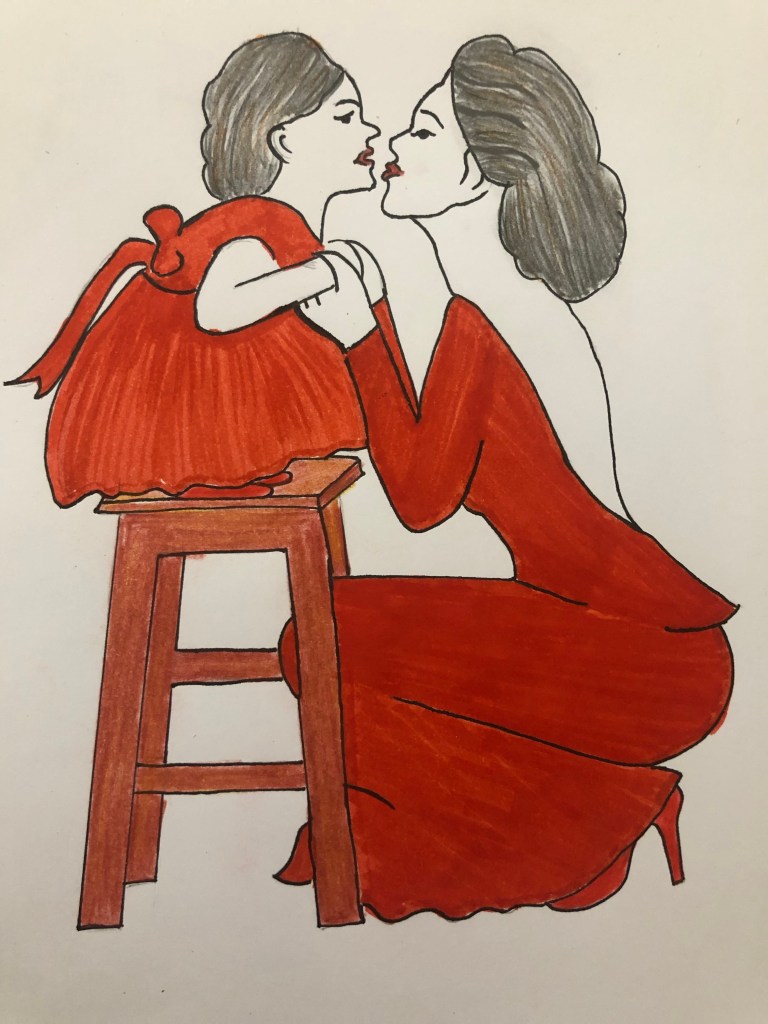
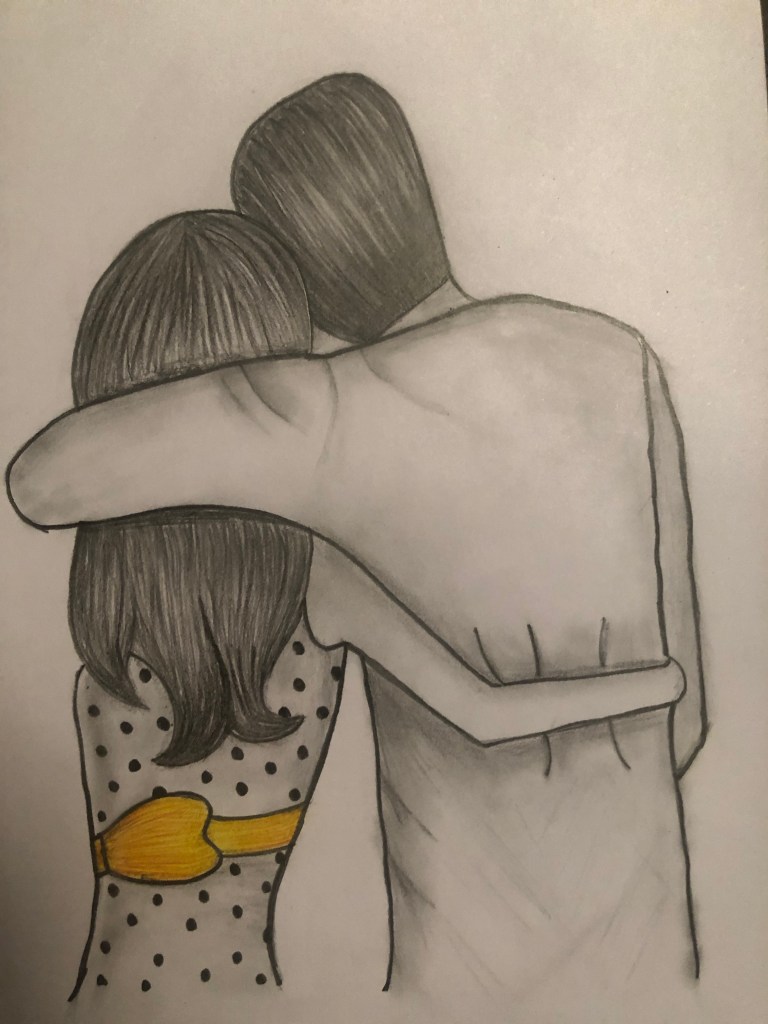
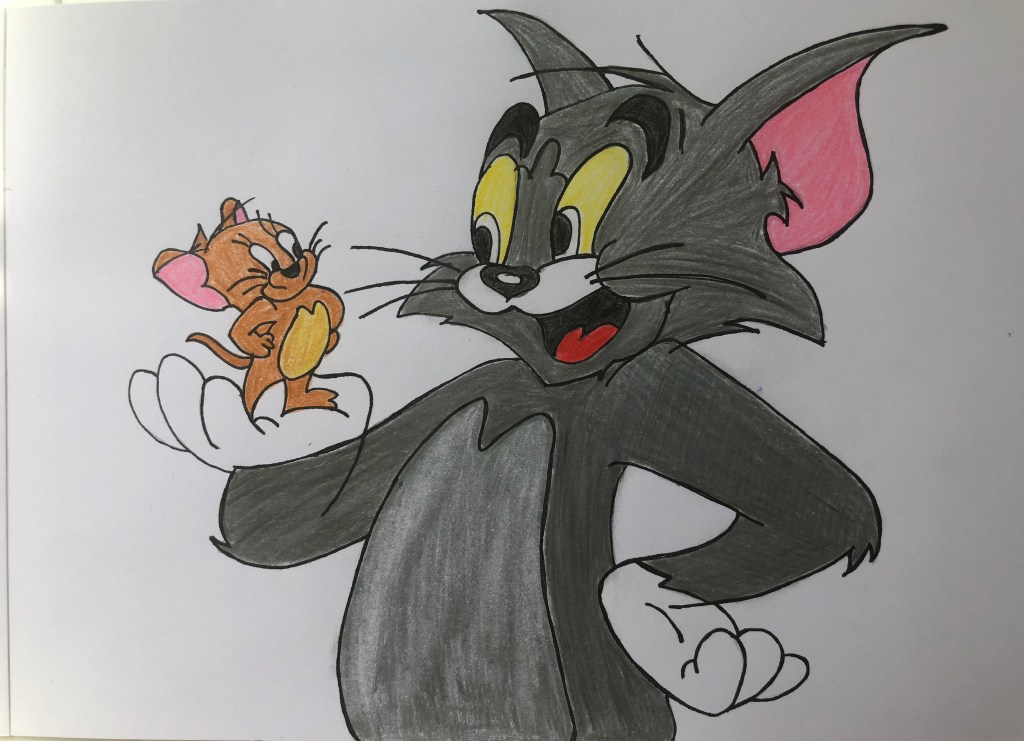
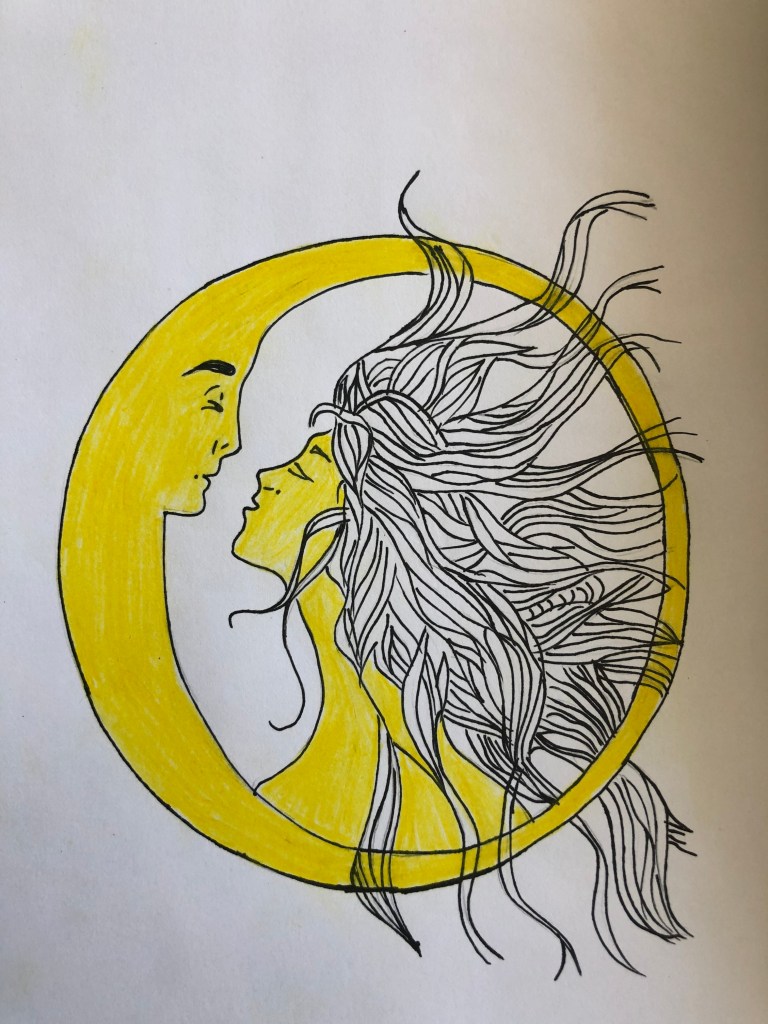
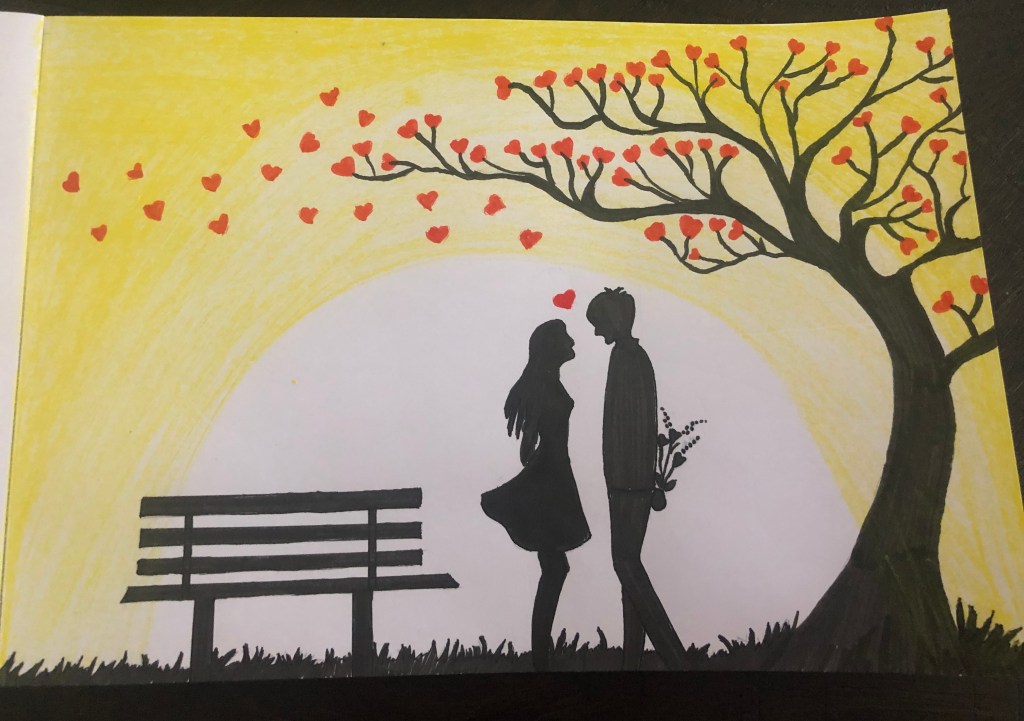
Social Distancing has got me try so many new things I never did before. Recently, I tried my hands at sketching and absolutely enjoyed it. Anyone who knows me well knows that I am extremely passionate about Arts and Crafts – I have my Mother to thank for that. I inherit all my creative skills from her.
Here are some of the sketches I created. Let me know what you think of them.
Date Nights have been so much easier until now to simply go out for a dinner, movie, concert or anything fun. But with staying at home we needed to get more creative to spend some quality time with each other especially to unwind from everything going around.
But who says you cannot make At-Home Date Nights fun and exciting? My husband and I tried these At Home Date Nights during the lockdown and had such a fun time. Here is a list of some fun ideas we did together until the pandemic settles.
Tie – Dye Date Night – The tie-dye trend is so strong right now and we thought why not try and do it ourselves. We ordered the Tie-Dye Kit which included all the tie dye colors, gloves, rubber bands and plastic bags and a tie to secure your tie -dyed things. What we enjoyed the most about it was there is no correct or wrong way of doing it. We just let our creative juices flow and created some fun his and her styles tshirts, a baseball cap and even a travel pouch. It was such a fun night of creating something together and spending some quality time. Here is a picture of what we created.
2. Cocktail Making Contest – If both of you enjoy drinking this is definitely a fun idea for a date night. We had so much fun creating our own cocktails from ingredients we already had at home. We were surprised at how creative we got and the result of which was some really amazing concoctions using spirits, fruits, and spices. Even if you don’t come up with the best cocktails you will definitely have a great time.
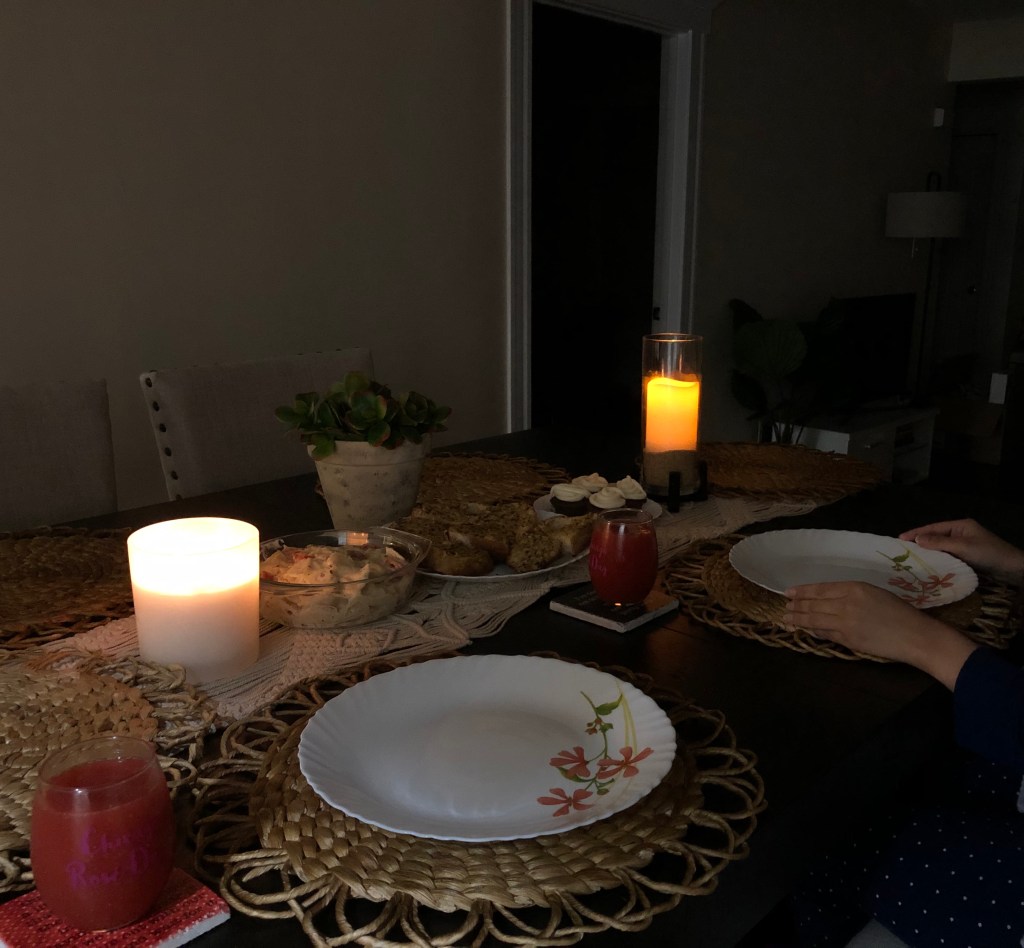
3. Candlelit Dinner – Convert the experience of cooking at home a fun one by planning a fun Candlelit dinner. You can make it extremely fancy by having a three course meal – Appetizer, Main and Dessert or keep it simple by cooking just the main dish. But who cares as long as you are having fun. Put on some romantic music while cooking and then enjoy your meal at the dining table by lighting a few candles and having a romantic candle lit dinner with your favorite drinks. I love to dress up and use this time to dress up a little to get the whole experience but it is completely up to you.
4. Movie Marathon – A fun things to do is doing a movie marathon. My husband and I are Harry Potter fans so we did a fun Harry Potter movie marathon while binging on some popcorn and tortillas with salsa and guacamole. But literally you can pick anything you have been waiting to watch or love watching together and go with it. To make it feel like we are watching a movie in the theatre we turn off all the lights.
5. Game Nights – If you enjoy game nights then it is definitely a fun date night idea. We enjoy playing board and card games like Sequence, Code names duet, Ludo, Phase 10, Monopoly, etc. Recently I also learnt playing Chess on one of our date nights and was so much fun. Another fun game is the Newlywed game or Not So Newlywed game.
6. Bucket List Theme Date Night – Have a list of countries you want to visit or had been planning to visit if we were not in this pandemic? Why not convert it into a fun experience and make the most of it.
For Example – If you were planning to visit Mexico – How about make some tacos, nachos, quesadillas, etc.
If you were planning to visit India – How about making some Indian curries, biryani or some chaat?
If you were planning to visit Italy – Cook some Italian dishes like spaghetti, pizza, gnocchi, etc.
If you were planning to visit Japan – How about trying to make some sushi or ramen?
If you were planning to visit China – How about making some noodles, stir fry, fried rice or dumplings.
The options are unlimited depending on the country you pick up.
7. Karaoke Date Night – If you have a karaoke microphone great but even if you don’t just put on you tube and select song with lyrics you like and sing your hearts out. Better yet no one is watching you so you don’t need to care how you sing and just have fun.
8. Sip and Paint Date Night – Have some canvas, paints or brushes handy ? How about painting while sipping your favorite drink and also create some fun wall art for your home at the same time? Even if you don’t have a canvas and just have some drawing paper and colors or pencils you can sketch together and frame them and create your own wall art for your home. It doesn’t have to be anything complicated it can be something simple too. We created some fun frames.
9. Watch your wedding video – Now may be a perfect time to sit back, relax and binge on some snacks while watching your wedding video and photos and reliving those moments together. You can also surprise your partner by swapping your wedding DVD with another movie DVD so he/she will not know till you are actually watching it together. At the end if you want you can also make a small cake/cupcake and enjoy it like you did on your wedding.
10. Picnic in your Backyard – If you are looking for a fun date idea during the day you can also have a picnic in your backyard. You can take a blanket to sit on and some snacks, chips and sandwiches with some sangria/mimosas/wine or any beverage of your choice and play some music on your phone and play some board games as well.
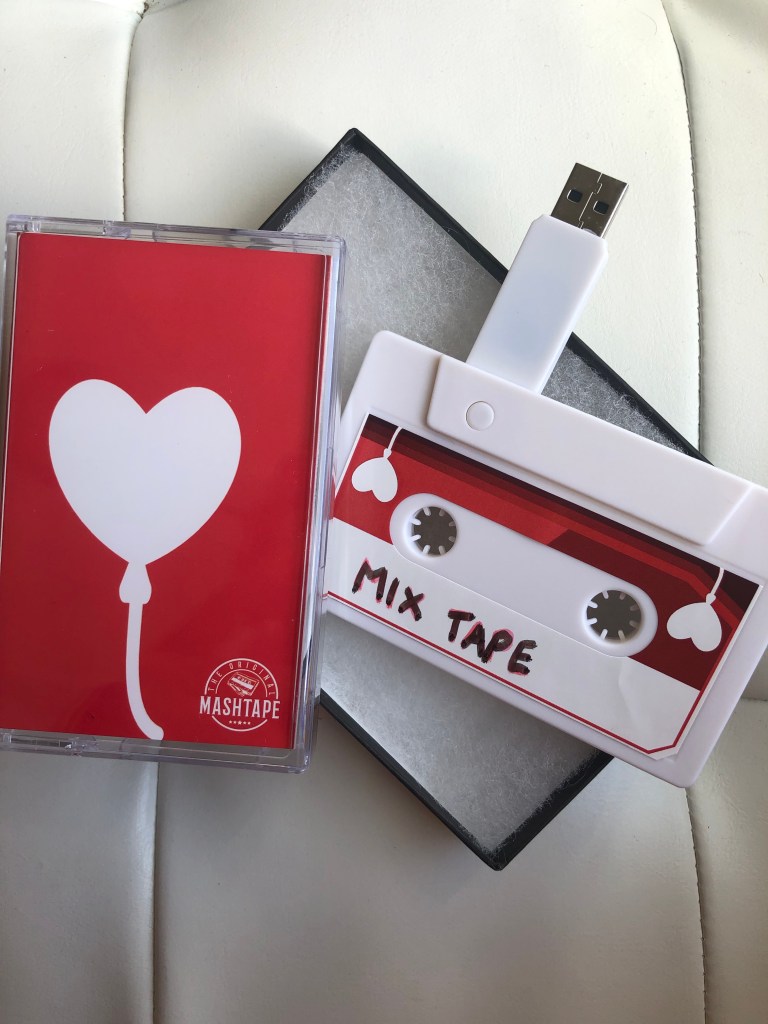
11. Make a playlist of your favorite songs – A fun date night idea is creating a playlist of all your favorite songs. You can pen down all your favorite songs and create a mix tape so the next time you fit the road you are all set and have your favorite songs ready to play and groove. We had got a mix tape long ago to create our playlist and finally created one during the social distancing time.
Do you have any fun date night ideas that you enjoy? Feel free to share your thoughts and what you do on your date nights. I would love to hear about them.
With the pandemic going strong we are all feeling a little strange and missing our families but lets not get it in the way to express our love to our loved ones this Mothers day. Make your mom, grandmom and newly minted moms feel special with these small gestures that will go a long way.
Cook her Breakfast in Bed – If you live with her you can prepare her favorite breakfast and coffee and start the day on the right note by pampering her.
2. Watch a Mother Daughter Movie Together – Even if you are not living together you can easily block a time of the day which works for both of you and watch a movie together and Netflix makes it possible with Netflix Party. Some fun movies to watch are Little Women, Monster in Law, Dumplin, Mamma Mia, I Don’t know How she Does it, etc.
3. Take an Online Cooking Class together – Sign up for an online cooking class of your liking and learn to cook something new together. Whether you have always been wanting to take a speciality class or cook a meal from scratch go for it.
4. Host a Virtual Happy Hour on Zoom – Set aside time and using zoom or any video conferencing app tune in to your favorite concert, play games or simply chat your hearts away while sipping on some cocktails or mocktails of your choice.
5. Take a Virtual Fitness Class together – Sign up for a Virtual fitness class together of your choice be it yoga, mat pilates, cardio or even dance and sweat it together.
6. Create a Slideshow for Mothers Day – You can create a fun slideshow for Mothers’s Day and share it with her. It can include pictures from your childhood and messages from her loved ones thanking her or saying something beautiful to appreciate her. It will be a beautiful memory she can cherish forever.
7. Send her an Ecard – You can create your own ECard using any of the free apps available with messages from her loved ones or even a small poem to appreciate her and make her feel special.
8. Create a Video – One of the easiest things to do is you can ask all your siblings or all the loved ones to send a personal message for her and combine it together and share it with her. She will definitely admire the gesture and feel special.
9. Plan a Surprise Dinner for Her – You can always plan a special surprise dinner for her and cook all her favorite things from appetizers, mains and dessert. And off course don’t forget to get her favorite drink. If you have extra time on hand you can also decorate the dining area to add a personal touch.
10. Send Her a Thoughtful Care Package – If you cannot be with her and cannot do anything of the above you can always send her a thoughtful care package to let her know you are thinking of her and really appreciate everything she does for you. Will definitely bring a smile to her face.
If you are looking for Gifts Ideas on Mother’s Day check this post. I have written an entire post on fun gift ideas on a budget. There is something for everyone!
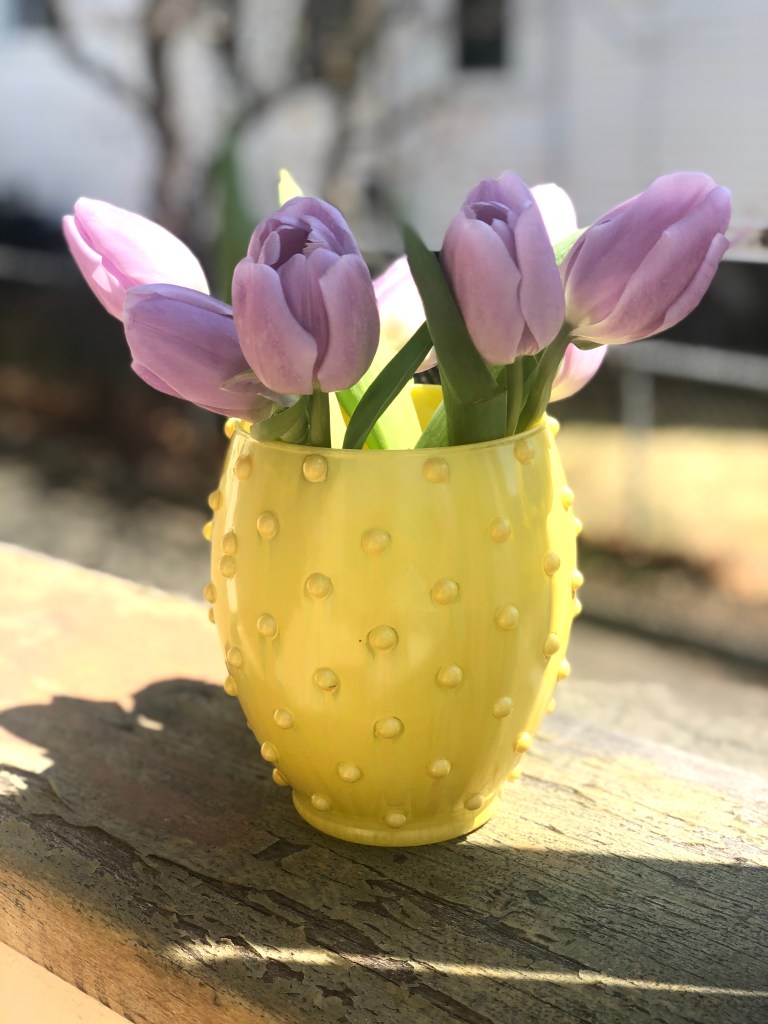
Spring is finally here and I cannot get enough of flowers and plants. Especially in these times when we spend more time at home, color and greenery immediately uplifts me and makes me feel happier. I had some supplies at home and decided to use them to create a sunshine vase. Sharing this super easy and quick DIY with you.
Materials Needed
— Pearl Stickers
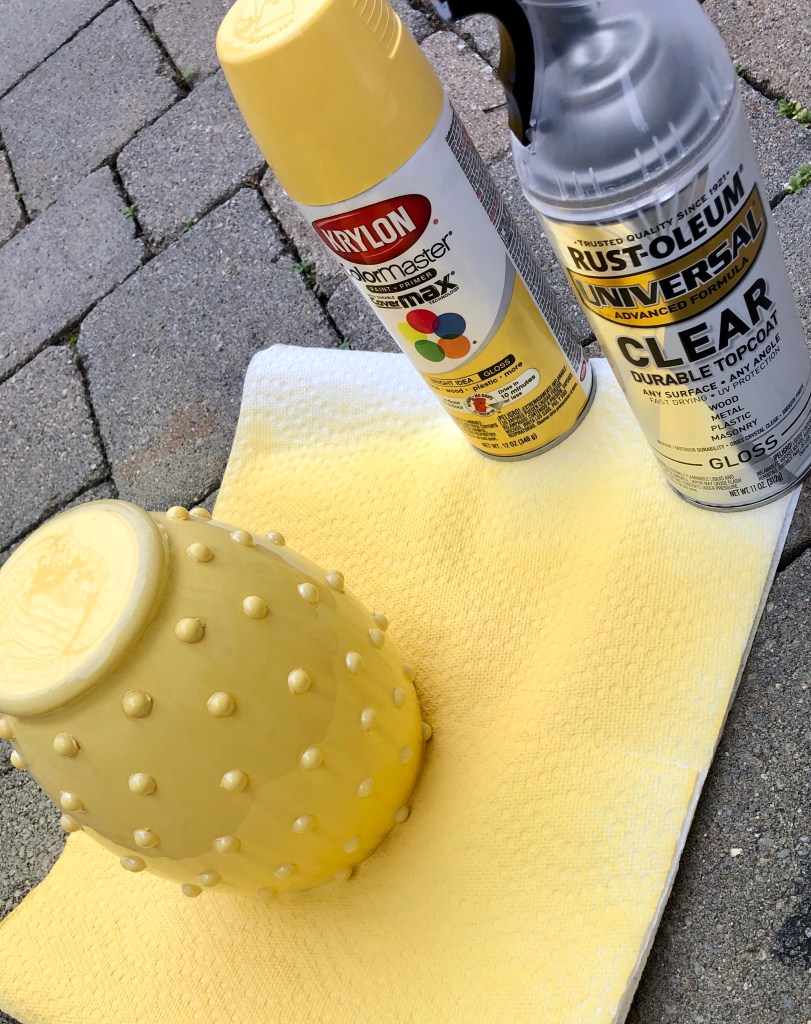
— Spray Paint of your choice (I used Yellow Gloss)
— Durable Topcoat (I used Gloss)
— Clear Glass Bowl
— Faux Flowers/Real Plants or Flowers
I got all my materials from Michaels and they are still doing delivery.
Directions
The first thing I did is washed the clear bowl with warm soapy water to ensure that there are no prints on it.
Next I took the pearl stickers and stuck them on the clear glass bowl in the design or pattern I wanted. I created a diamond shaped pattern. The pearl stickers do not need any additional adhesive to stick that what is already on them which makes it really easy for anyone to do including kids with minimal materials.
Once the pearl stickers were applied, I took the glass bowl outdoors to spray paint in a well ventilated area and spray painted the entire glass bowl yellow turning the glass bowl upside down for easier application.
You can keep adding coats of spray paint as long as you get the desired color. Just remember to keep an interval of at least 15 minutes between each coat.
Lastly, seal it with a topcoat of your choice – gloss or matte. And let your vase dry for a minimum of 24 hours.
Once the vase has dried add faux/real plants or Flowers and add them anywhere in your house. I ordered some Tulips with my groceries and added them to add a touch of spring. After all, what says Spring more than Yellow + Tulips.
Hope you enjoyed this easy DIY and have fun creating it!!