Travel

A day trip to Watkins Glen State Park from Niagara Falls

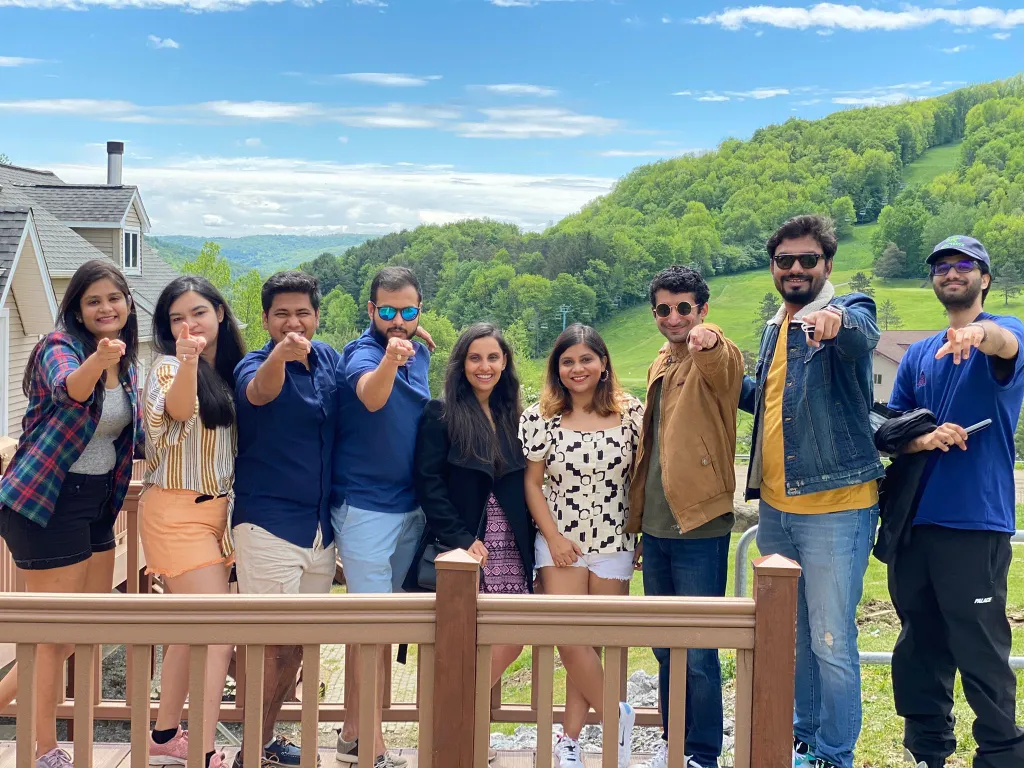
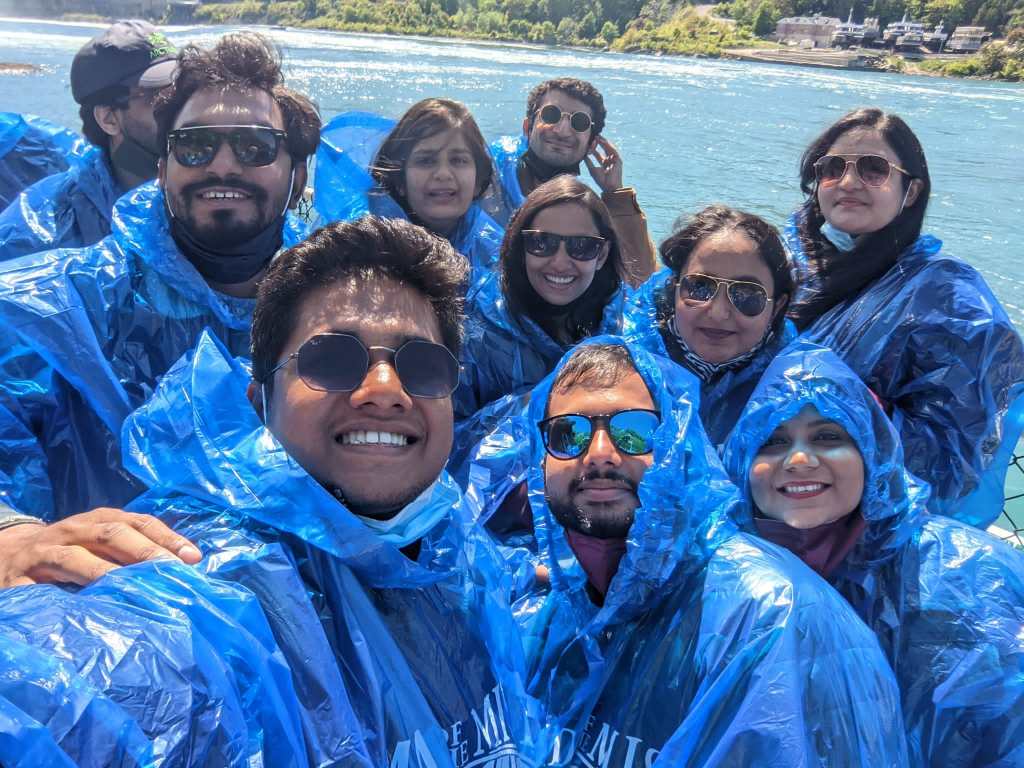
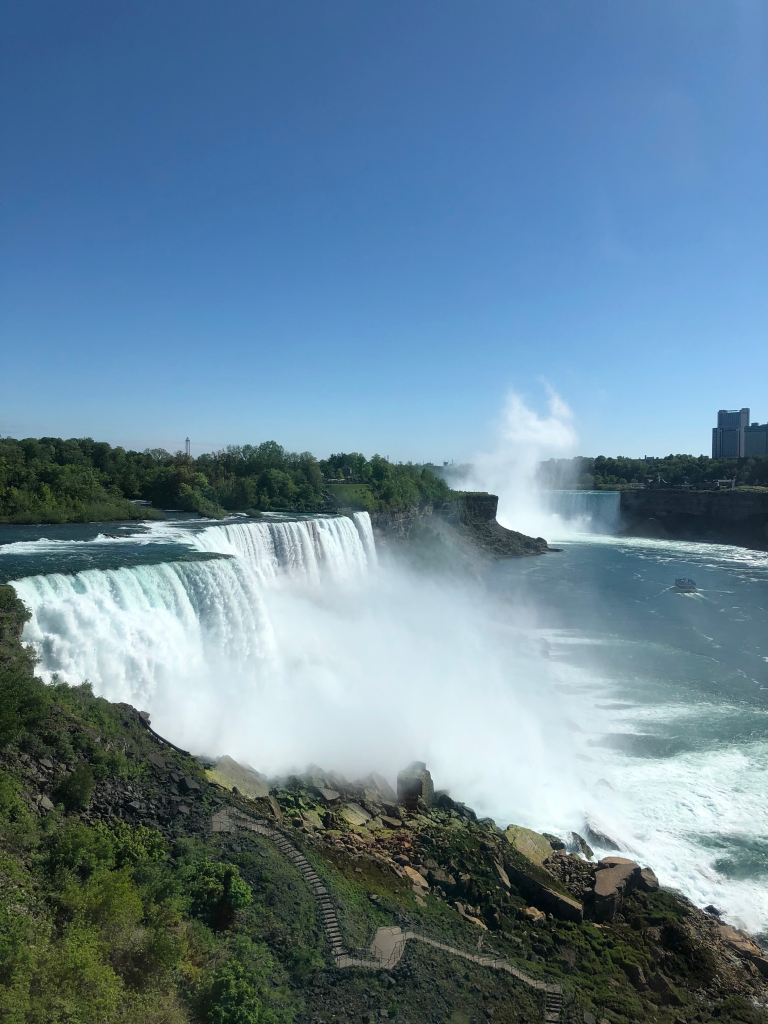
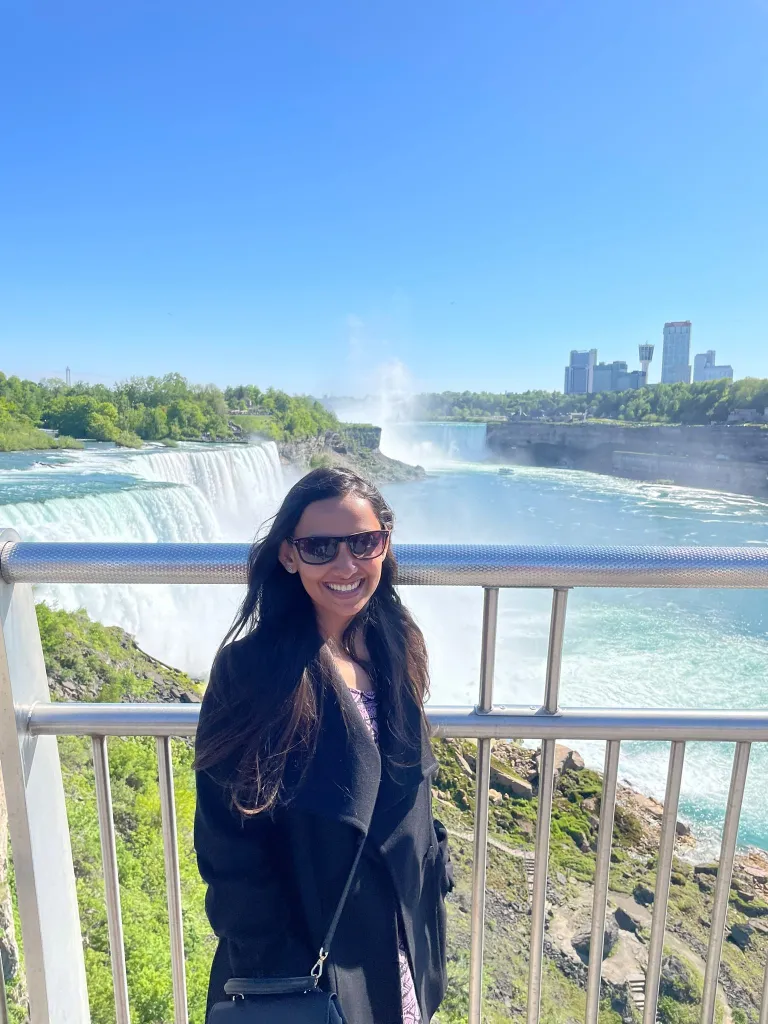
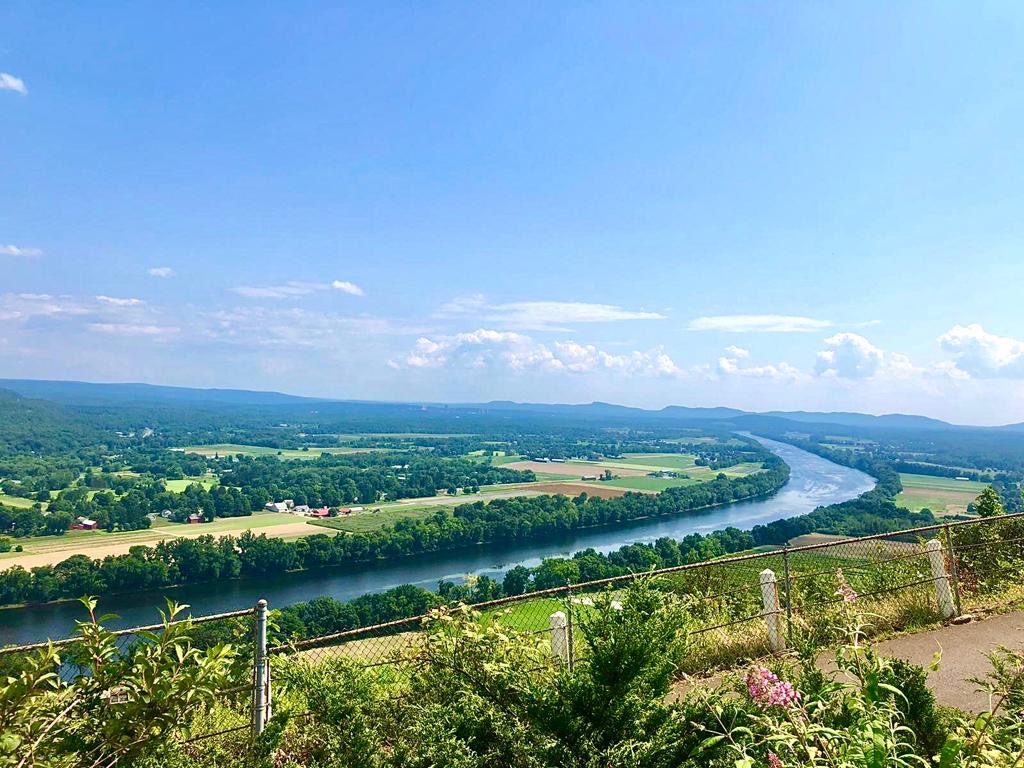
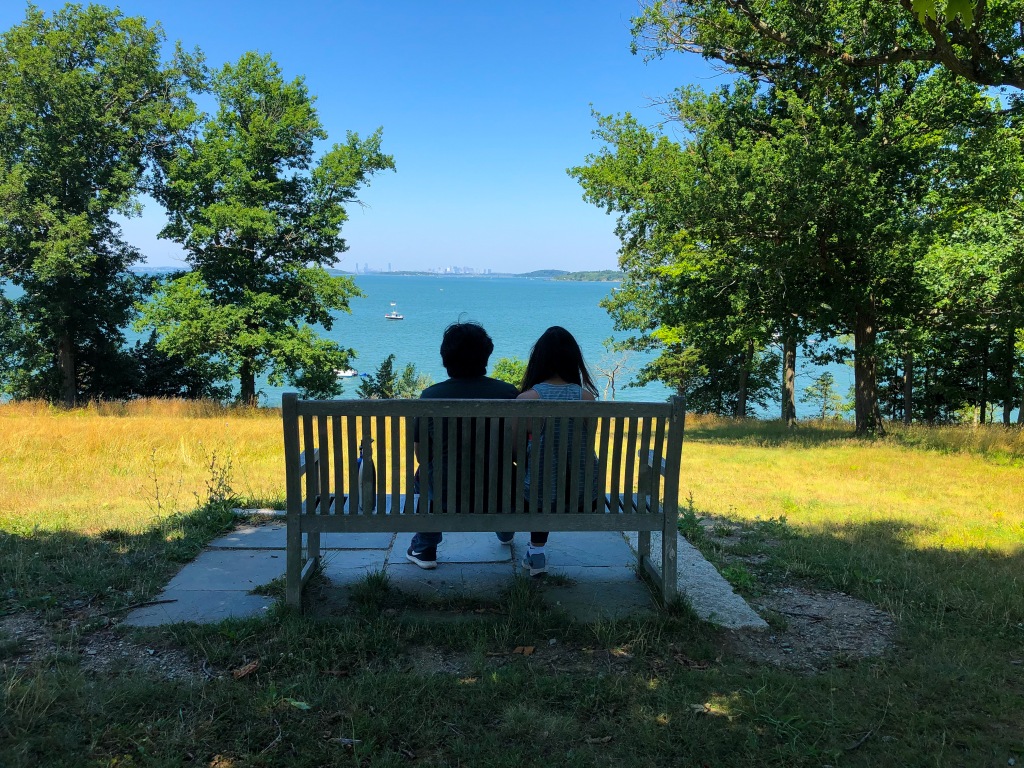
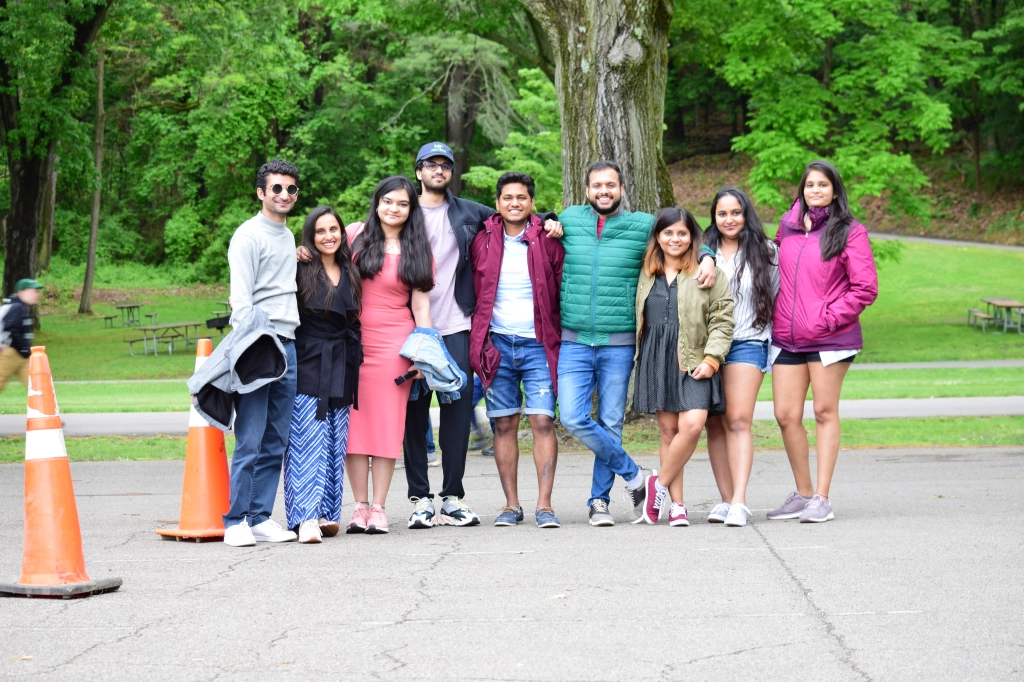
Known for its world famous motor racetrack, award winning wineries and a state park full of waterfalls Watkins Glen is a great place for a road trip with Instagram worthy scenery for the whole family. I travelled to Niagara Falls with my friends and on our way to Niagara Falls, New York we decided to take a day trip to the beautiful and popular Watkins Glen State Park in Finger Lakes. Located on the southern tip of Seneca Lake in the Finger lakes, Watkins Glen State Park is a gorgeous place for hiking, camping and outdoor recreation.

As we were only doing a day trip to Watkins Glen on our way to the majestic Niagara Falls, we decided to visit Watkins Glen State Park, famous for its stream -carved gorge now preserved as a State Park.

Fun Facts about Watkins Glen State Park

  1. The gorge derived its name from Dr. Samuel Watkins and his brother John who acquired land in the area in the 1850’s.
  2. To increase tourist appeal, in the mid 1920’s the word “Glen” was added to the town name – Watkins.
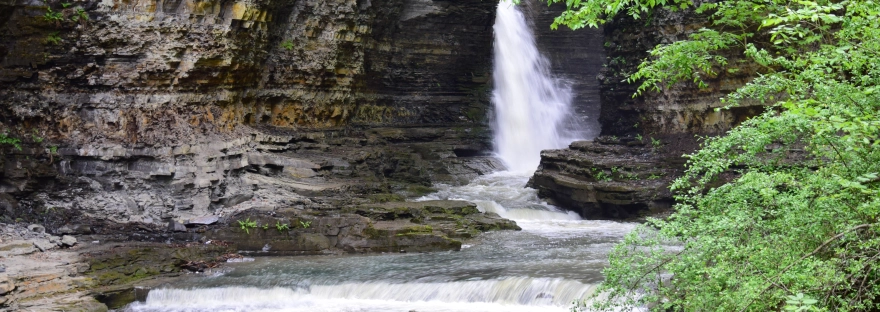
  3. Within two miles, the glen’s stream descends 400 feet past 200-foot cliffs generating 19 waterfalls.
  4. The gorge emerged more than 2.5 million years ago during the Pleistocene Ice Age when the polar ice sheet advanced and receded and making it wider and deeper each time the ice sheet advanced southward.

When to Visit?

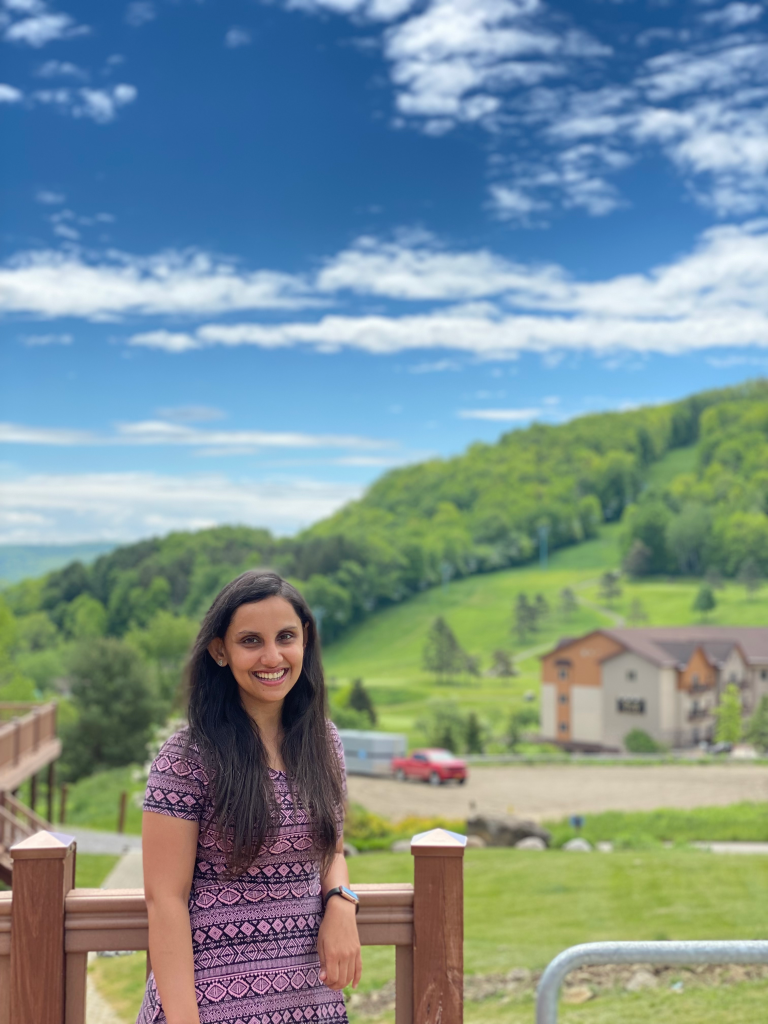
Watkins Glen is open all year however the best time to visit the park is anytime other than the winter months. Personally, we visited the state park in May and thought it was the perfect time to enjoy and explore the State Park without it being too hot or too cold. We combined it with our trip to the Niagara Falls.

Where to enter the park ?

There are three entrances to enter the park – Upper, South and Main. We entered the park through the South Entrance as we also made a quick stop at the Hector Falls along the way which are the third tallest falls in the state. Since the South entrance sits between the main and upper entrances its a great place to start as you will be in the middle of the park and you can retrace your steps as you like. There is no fee to visit the park although there is a parking fee of $8 per vehicle. The upper entrance is not as busy as the other entrances and on long holidays or weekends it may be easier to find parking here in case the main and south entrance are full.

The scenic gorge trail is family friendly however not the most accessible for those with mobility issues. It is an easy and incredible hike with gorgeous views but just be careful as the wet leaves and waterfalls make the path a little slippery sometimes.

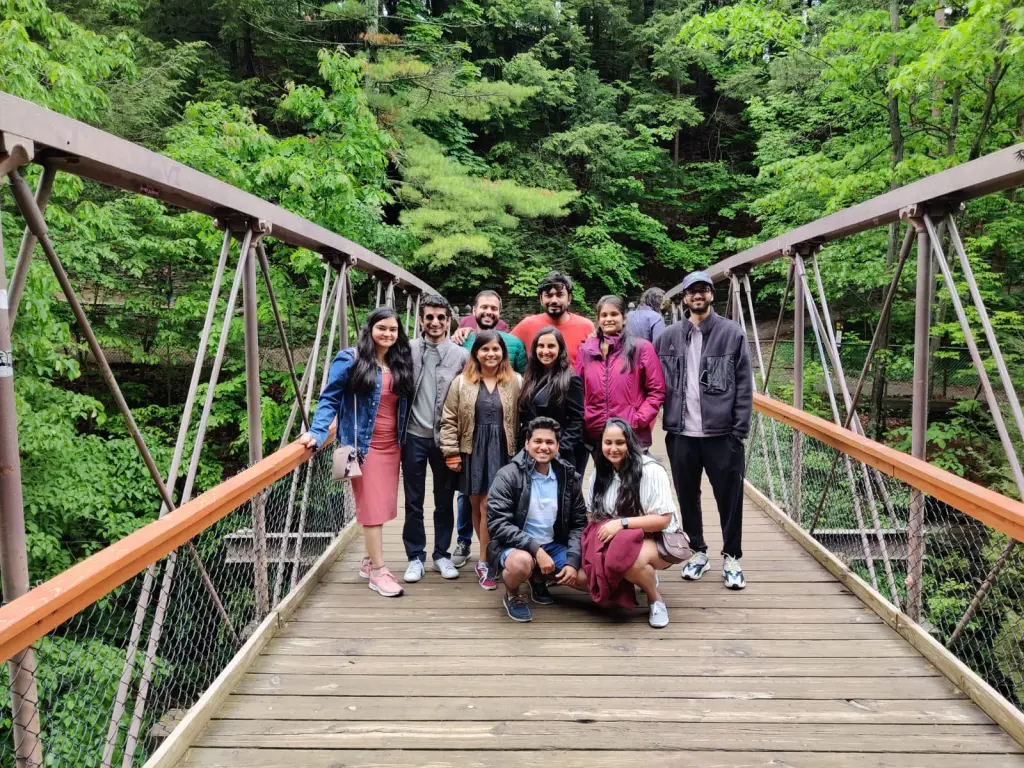
We explored walking along the spectacular gorge soaking in the lush greens, waterfalls and fresh air. Walking through a spiral staircase we found ourselves at the Suspension bridge crossing over Watkins Glen Gorge. It made me get lost in nature while also connecting with myself on a deeper level and feeling absolutely rejuvenated.

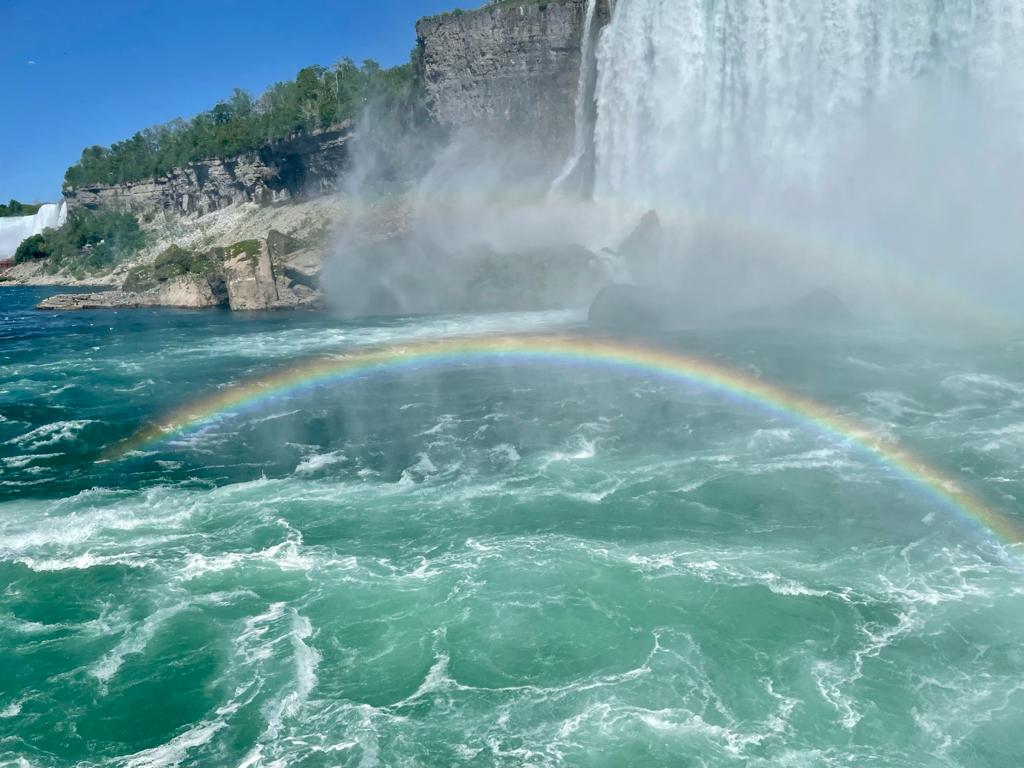
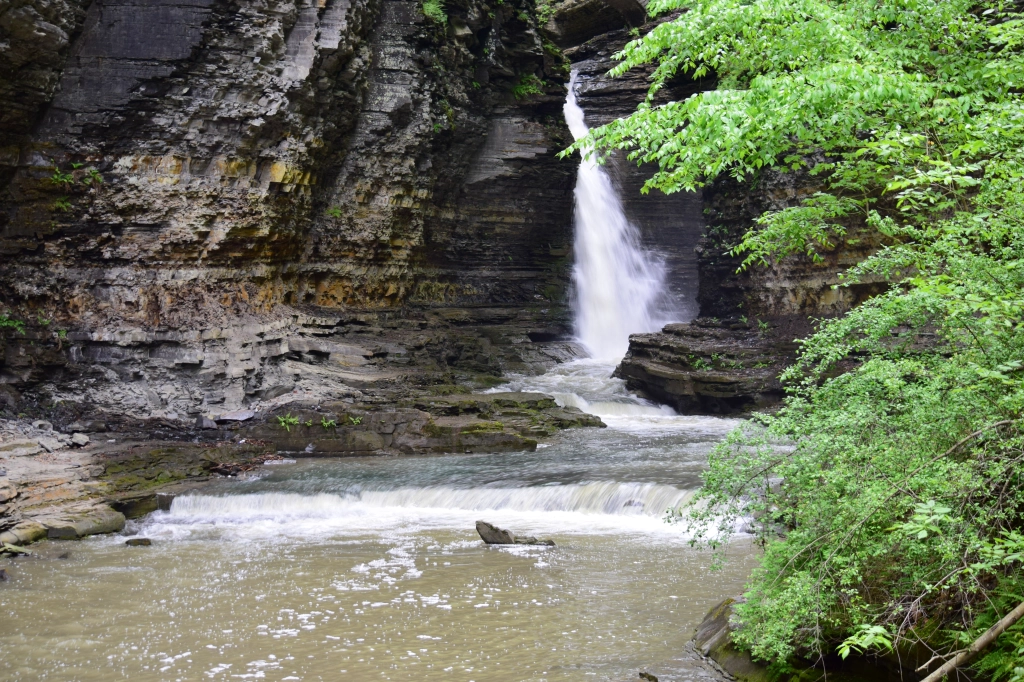
While all the falls are beautiful my absolute favorite was the Rainbow Falls. We spent most of our time at the striking, delicate, dramatic and beautiful Rainbow Falls. The view from here is absolutely marvelous. The water falling from above, the bridge in the background, the lovely stone stairs is something that looks like from a fairytale. Did you know – The falls get its name from the rainbows that appear in the mist of the falls on sunny days.

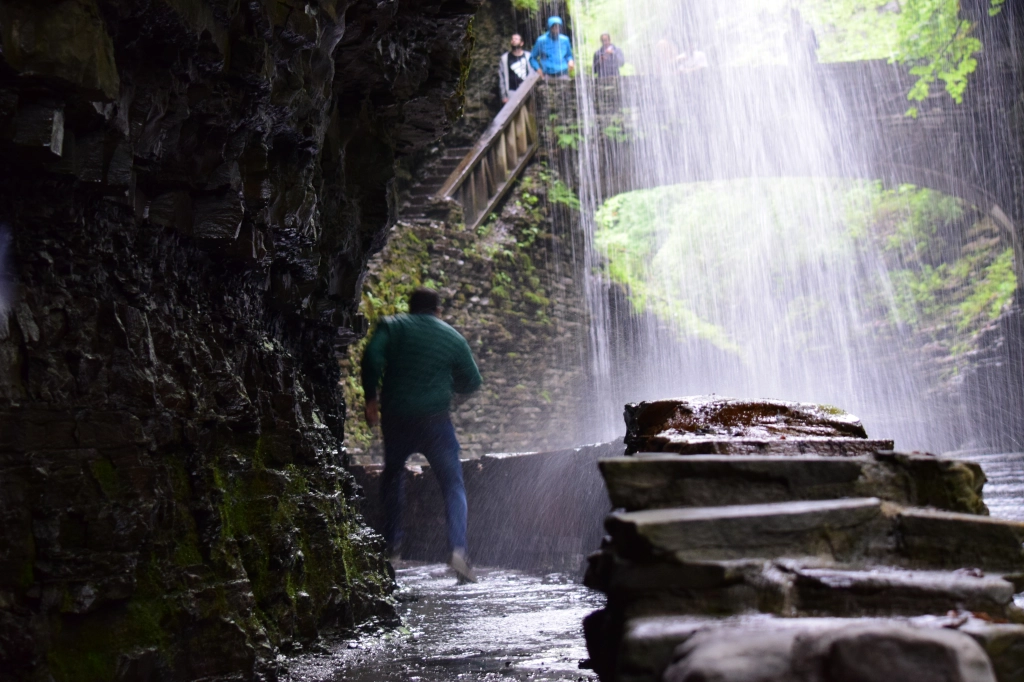
As we explored the gorge, we were pleasantly surprised by the powerful Cavern Cascade. The spiral tunnel seemed like a dead end but as we walked down, it led us underneath the Cavern Cascade. Try to put your hand underneath the falls and you will be surprised to find out how strong the current is.

Tips for visiting Watkins Glen State Park

  1. Carry water as there is no water fountain along the trail.
  2. Wear waterproof and comfortable shoes.
  3. During the summer months there is a bus shuttle between the three entrances which helps navigates around the park.
  4. Carry a map, it will come in handy to know where you are and what you would like to explore.

If you are looking for the ultimate travel guide to Niagara Falls which is only a 2.5 hours drive check out my blog post here

Hope you enjoyed reading my post! If you have any questions please feel free to leave a comment or email me and I will be happy to answer them. For all other travel guides and to receive my blog posts subscribe to the blog follow me on Instagram.

Food, Travel

A Complete Travel Guide to Niagara Falls

Spanning the border between the province of Ontario in Canada and the state of New York in the United States are the majestic Niagara Falls which has been on my bucket list for a long time. Every time I saw pictures or videos I have been marveled at the miracle of the nature and I was beyond ecstatic to finally visit them over the Memorial Day weekend with my friends and experience it myself. To say, I was left speechless and lost in thoughts would be an understatement.

There are two sides to the Niagara Falls – The US side and the Canadian side. Niagara Falls is a group of three waterfalls. The spectacular falls can be toured by boat, helicopter or on your own two feet. The largest of the three falls is the Horseshoe Falls and is also known as the Canadian Falls and the smaller two falls – Bridal Veil Falls and American Falls lie on the American side. I haven’t been to the Canadian side yet and would love to go to see the Horseshoe Falls in its entirety however you can see all the three falls from the US side and trust me it is breathtaking either way. 

One of my friend quoted and it stuck with me ” In Canada you see the falls, and in US you feel the falls”.

How to get to Niagara Falls

We drove to Niagara Falls from Boston starting on Friday evening at 5.00 pm EST and took a few stops to do things along the way and stay over the night. Niagara Falls is approximately 460 miles from Boston. You can also fly to Buffalo Niagara International Airport and then drive to the falls which is approximately 30 minutes away.

Where to Stay

We stayed at Ellicottville, New York which was approximately a one hour and fifteen-minute drive to the Niagara Falls. Check out the place here. We really enjoyed our stay here and it was perfect for our group of 10. Ellicottville is known for its ski resorts. We booked only a week before the Memorial Day weekend and most of the places we liked near Niagara Falls were sold out. If you are looking for an upscale hotel and place closer to the falls check out Seneca Niagara Hotel & Casino. Some other options closer are Hyatt Place Niagara Falls and Red Coach Inn.

Best Time to Visit Niagara

The best time to visit the falls is mid-May through mid-September. However, the peak season is in summer from June to August. However, having said that there is no right or wrong time to visit in Niagara. The colder winter months offer a chance to see the falls frozen which is something I want to visit as well. If you also wish to explore some of the parks around New York like us, May is great time as it is not too hot or too cold.

Must do things in Niagara Falls

Maid of the Mist – If there is only one thing you can do, I highly recommend this tour. This is an absolute must do! Strolling along the water’s edge and viewing the Niagara Falls from an outlook is one thing but viewing the falls from the vantage point of the water via a boat tour on the Maid of the Mist is a totally different experience. If you are traveling during long weekends or at peak times there is likely going to be two hours wait time or more. The tickets to this tour are $25.25 for adults and I recommend buying them in advance especially if you are visiting during busy times. They provide you ponchos on the tour so that you are do not get wet. Experiencing the roar and the drenching spray of mist of the powerful and hypnotic falls is surreal. We were lucky to see two rainbows formed as a result of the mist in the air You can check the schedule and book you ticket here.

Things to know for the tour:

  1. Carry a waterproof phone or GoPro to capture the mighty falls.
  2. Be ready to wait in long queues. But don’t worry it is worth the wait.
  3. The tour runs every 15 minutes and lasts approximately 20 minutes.
  4. Tour times cannot be reserved in advance.
  • Observation Tower – After the Maid of the Mist tour we headed to the Observation tower to soak in the panoramic views. It is the only place where you can see both the American falls and the Horseshoe Falls together.
  • Illuminated Falls â€“ When the sun goes down the striking Niagara Falls are illuminated every night of the year beginning at dusk all the way up to 2.00 am in the summer and create a stunning vista that can be marveled from near and far. Did you know – the first ever illumination took place in 1860 with 200 Bengal lights to honor the visit of Prince of Whales as a one-night event. You can check the Illumination schedule here. Usually, in the summer every night at 10.00 pm there are fireworks at the falls but due to the COVID-19 restrictions the fireworks are cancelled for 2021.
  • Cave of the Winds â€“ This is one thing we could not do as the tickets were sold out for the day but cannot wait to go back and try this. Highly recommend booking the tickets by going in early as they are not sold online to avoid the tickets being sold out. I have heard that there is no better way to experience the mighty power of the falls safely than standing underneath a torrent of water on the famous Hurricane Deck. They provide yellow ponchos for this experience but you are bound to get drenched so carry a change of clothes and wear footwear accordingly. Did you know – the decking is removed each fall due to potential damage and re-installed each spring by the park officials to enjoy the experience. Cannot wait to go back and try this enthralling experience!!
  • Rainbow Bridge â€“ Unfortunately due to the Covid-19 restrictions the Canadian border was closed and we could not cross the border at the Niagara Falls. You can either walk or drive on the Rainbow bridge to cross the border but remember you need a valid Canadian visa to go if you are going from New York. It takes approximately five minutes to walk this bridge. You can literally have one foot in US and one in Canada on this bridge. 
  • Terrapin Point– The best view of the Horseshoe falls other than from the Maid of the mist is from the Terrapin point to see the falls and mists forming up close.  This is a great place to check out the illuminated falls. 
  • Goat Island – You can also explore and walk around the Goat Island. The best way to explore the goat island is on foot. Goat Island is in the middle of the Niagara River. The island splits the Niagara River in two before it cascades over the Horseshoe Falls and the American Falls. It is a great place to enjoy the natural beauty and view of the falls. It is connected to the Luna Island with a pedestrian bridge. 

Where to Eat

  1. Kathi Roll on the Falls â€“ Highly recommend trying this food truck for its lip smacking and delicious kathi rolls. My favorite kathi rolls were the Aloo roll and the Chana roll. I also liked the paneer roll. They offer many options to choose from for vegetarians as well and this place does not disappoint.
  2. Dosa Hut Fine Indian Cuisine – We also tried another food truck and tried the masala dosa, idli sambhar, parathas, channa masala, and samosa chaat here. I personally enjoyed the samosa chaat here the most. 

Day Trips from Niagara Falls

  1. Watkins Glen State Park – 2.5 hours from Niagara Falls. We took a day trip to Watkins Glen State Park. Check out the complete guide on what to do and where to eat here.
  2. Letchworth State Park – This is another great day trip to explore which is only 1.5 hours from Niagara Falls.

If you have any questions, please leave a comment and I will be happy to answer all your questions. Hope you enjoyed the post! 

Food, Travel

Islamorada – A day trip from Miami

I recently visited Miami with my friends in April and took a day trip to Islamorada and fell in love with it at first glance. Known for its towering palm trees, sandy beaches, pristine and clear water, laid-back vibe, and breathtaking sunsets, Islamorada is a complete paradise. Did you know? – Islamorada is one of the Florida Keys and is on the way to Key West.

Only a 90 mins drive from Miami, Islamorada is a great place to go for a day trip. Islamorada is known as the sport fishing capital of the world with beautiful local restaurants and quaint shops with a small town island vibe which I absolutely love. Even if fishing is not your thing it is equally appealing for divers, snorkelers and kayaking.

Fun Fact – The name Islamorada came from the early Spanish explorers in the area which means Purple Isle.

Things to do

While there are a lot of things to do in Islamorada our goal was to just enjoy the beaches, relax and sip in some cocktails with delicious food.

  1. Anne’s beach – This is one of the most popular beaches in Islamorada and for good reason. It has very clear blue waters making it picturesque. It has picnic spots to enjoy the stunning views and is a small beach with shallow waters. It does not have much of sandy areas so if you are in a large group like us you may not find enough space to enjoy the sandy areas and just relax. However, it has a great boardwalk and is one of the beaches in Islamorada where you can bring your pets.
  2. Sombrero Beach, Marathon – This beach is approximately 25 miles ahead of Anne’s beach but absolutely amazing if you are looking for a white sandy beach to just relax and soak in the sun this is great. If you enjoy swimming I would recommend heading to this one and a bonus its a great place to catch the sunset!! Also this beach has a great volleyball court and a park area for kids.

Where to Eat

  1. Morada Bay Beach Cafe– A cute cafe with waterfront dining overlooking the Florida Bay. A great place to get drinks and food with stunning views. We went here during Covid times and what I appreciated the most was that the tables were spread out making it very easy to maintain social distancing.
  2. Lorelai’s Restaurant and Cabana Bar – What can I say!! I absolutely loved the place. It has so many amazing food options to pick from even for vegetarians and everything was so fresh. A great place to grab delicious food, tasty drinks, waterfront views overlooking the Florida bay(beautiful sunsets), and live entertainment from local bands. Very well spaced table to maintain social distancing and have some privacy. Highly Recommend!!

Hope you enjoy reading this post. Check out the complete travel guide to Miami here. Feel free to reach out to me if you have any questions!

Food, Travel

Getaway : A Cabin Experience and Escape from Boston

I know this post has been long due and I apologize for the long break without posts. 2020 had been a difficult year to say the least and my husband and I decided to end the year detaching ourselves from technology and soaking ourselves in nature. I started university back in Fall 2020 to pursue my MBA and at the end of my semester I was exhausted and ready to spend sometime off from the computer and I could not be happier. Personally, we did not want to take a flight and travel unless absolutely necessary due to the pandemic and also wanted to maintain social distancing while enjoying sometime off. We travelled to the Getaway house towards the end of December for three days two nights and picked the Escape from Boston which is located in New Hampshire. This New Hampshire Getaway House fulfilled it all for us!

The Getaway house is located at various locations throughout the country such as NYC, Atlanta, Washington D.C, Dallas, Houston, LA, Portland, etc. Use this link to receive $25 off your stay.

If you are someone who has always wanted to try camping and enjoys the outdoors but cannot go without a hot shower or a bathroom like me then the getaway experience is a perfect balance that offers the best of both worlds. It provides a comfy escape with the most relaxing views.

What is a Getaway House ?

For anyone who does not know what a getaway house is, let me explain it simply. A Getaway house is a container converted into cabin to provide a simplified glamping experience even for people with no camping experience. There are number of such cabins at each getaway location. The various cabins are spread in wooded areas approximately 150 feet apart from each other such that there is privacy and no one can see inside your cabin but also not too scary leaving you completely alone in the many acres of the wooded area.

One thing I really liked was all the cabins are named after the grandparents of the staff to honor their services and care they put in to ensure we enjoy a seamless experience. Our cabin name was Rose as it was beautiful.

What the Getaway is equipped with?

The getaway is equipped with all the essentials we needed for your stay and nothing that we didn’t making it a minimalist but amazing experience. Do not be fooled by the small size of the cabin. It is packed with literally everything you will need to make your stay so much more enjoyable. It is equipped with AC, heat, AM/FM radio, wireless speakers, toilet, hot shower, a private fire pit, grilling area with a picnic table and chairs, stove top, a mini refrigerator, salt, pepper, olive oil, utensils, a comfortable bed, etc. Check out the complete list of what is included in the house here. We also thought that the staff was extremely helpful and only a text or call away.

There is no WIFI at the getaway house and limited cell phone service depending on your provider which forces you to embrace the nature, enjoy the simple things in life and take a real break. They also provide a box to lock your phones away and enjoy yourselves without any devices. We actually thought this was a blessing after the crazy Zoom overdose we had. The Zoom fatigue was real and we could not think of a better way to completely switch off. We even put our phones in the box and locked them away for the weekend to enjoy a quiet time without any distractions. Trust me you will love it even if no WIFI and limited cell phone service sounds daunting at first. They provide some books and games at the cabin and we took our own books to read as well. It is was great way to shrug off the stress of work and detaching ourselves from the internet.

Safety and Security

Every Getaway house has a digital lock on the front door and a unique code which was texted to us on the day of check in with the name of your Cabin. This allowed us to securely lock our cabin while we explore around without worrying about your belongings.

Stay Options

The Getaway house offers two different kinds of cabins. One for two people (where we stayed) and one which can accommodate a maximum of four people(bunk beds) which is a great option for anyone traveling with kids. All the cabins have the bed located right next to the big glass window so we had the perfect view to wake up to. This is a great experience for anyone who wants to unplug and get away from the hustle of the everyday life. I thought it was a great place for even a solo traveler who loves to get inspired by nature and write a book, music, or any fun creative project on their mind.

Waking up in the morning with the perfect backdrop of nature was such a surreal experience. We absolutely loved the seating area created right next to the window and enjoyed sipping hot chocolate and reading a book in the cold. Could not think of a better way to start the day looking at the snow covered trees and enjoying the nature. Cannot wait to go back and try the other Getaway Houses at the other locations!

What to Pack/Bring ?

  1. Carry your favorite games, books or a creative project you would like to work on.
  2. Carry a bug spray if you are visiting during the summer months.
  3. A grill pan is optional not necessary.
  4. Grilling Food – Corn, strawberries, pineapple, ingredients to make kebabs, paneer/tofu, potatoes, bell peppers, onions, marshmallows, marinades, burgers, Maggi, etc.
  5. Snacking or any other Food items.
  6. Wine, champagne or anything you like to drink.
  7. Hot chocolate.
  8. Comfy clothes.

There are grocery stores nearby but I highly recommend planning and carrying what you need to save yourself a trip to the grocery store. The cabin also offers a survival kit if you like which includes food options.

Things to do Nearby

  1. Blasty Bough Brewing Company – If you want to check out some local brewery and try some local beers with beautiful views and live music check out the Blasty Bough Brewing Company. Check the link here for all the details.
  2. Pawtuckaway State Park – Located around 30 minutes from the cabin this state park offers hiking trails and boulders to climb. We did not do this during our stay but would love to check it out another time.

Things to do at the Getaway

  1. Movie/Game Night – We also did a movie and game night with popcorn and wine which we enjoyed a lot. We took some of the DVD’s of movies we wanted to watch and games we enjoyed. This was so much fun and I dont remember the last time I used a DVD before this experience. This was a great way to leave behind the reliance on Netflix and other streaming services.
  2. Grilling outside the cabin – Grilling under the stars, with a firepit was a perfect way for us to enjoy our nights with some music, wine and amazing food. They gave us a kit for grilling marshmallows, making s’mores too which was perfect to enjoy the fire pit outside during the cold month of December. They also provide fire wood, fire starting materials, a lighter and instructions on how to light a fire. They charge you at the end of your stay for the fire wood and the fire starting materials you used. It was our very first time to start a fire and the instructions were easy to follow. We enjoyed grilling kebabs, pineapple, strawberries and marshmallows, corn, paneer (an Indian version of tofu), and toasting s’mores and relished them. We loved it so much that we barely used the stovetop for any cooking even when it was freezing outside.
  3. Walk in the woods – If you are not in the mood to get out, the backyard of the Getaway House has nearby hiking/walking trails you can explore. We enjoyed walking around the trails nearby and collecting pinecones on the trails for the house.

Highly Recommend trying the Getaway House for a unique experience and coming home rejuvenated from the day to day stress of life. If you have any questions please feel free to reach out and leave a comment! Use this link to receive $25 off your stay

Lifestyle

How to Create a Vision Board | Tips to make a Vision Board that works

Have you ever wanted to create a Vision Board ? Or thought about what all the buzz about the Vision board is ? Well I created them since I was a kid but then I did it for pictures of friends and family back then.

Personally, if you ask me I am a visual person and I feel creating a space that displays all the intentions and goals of what I want to achieve in the upcoming year really helps me stay on track. It is a lift me up for me personally as the Vision board is basically a visualization tool used by building a collage of pictures and words for your aspirations and goals. I am a goals person over a resolution person as I find it more achievable and realistic and the Vision Board works like a charm for me.

Before I started making a Vision board, I listed all my goals small or big after reflecting on what I would like to accomplish by the end of the year. This takes time and thought but once this is done I feel the fun process begins.

Then, I looked for pictures, power words, quotes, objects that illustrated my goals and also inspired me to make my Vision Board. Books, magazines, cards, even searching online are all great places to find them. I created my own sketches of power words so literally there is no right or wrong. Create or pick what inspires or motivates you.

Next, I used a sturdy poster board and started placing all my final pictures, power words, quotes, objects, etc in a way which spoke to me. I did not glue anything first until I was sure how I wanted to place everything. Once I was happy with the alignment I glued it all using a gluestick. It never hurts to have more pictures than you actually need in fact it gives you enough options to pick the images you feel resonate the most with the goals you are striving for.

I created one Vision Board for all my goals such as travel, learning skills, personal growth, career, relationships, health, self-care, etc however you can always create separate Vision boards for different goals as well. You can add other goals like buying a house, being debt free, home improvements, losing weight, a new car, saving money, etc. The options are endless. I highly recommend keeping the Vision Board at a place you can see it daily to remind you of your goals and stay on track.

If you are a social butterfly you can totally host a Vision Board creating party where you can get together with friends and family and create your own Vision Boards as well.

Most importantly have fun with creating it and be true to your goals and aspirations and not fall under the trap of what others do or buzz words. The purpose of the Vision Board is to bring everything on it to life.

Hope you enjoy creating your vision board as much as I do! If you do create it please share your creations with me I would love to see what you come up with!!!

Travel

South Sugarloaf Trail- A Quick Hike in Western Massachusetts

South Sugarloaf Trail located near South Deerfield, Massachusetts boasts views of the Connecticut River, the Pioneer Valley and the Pelham and the Berkshire views. Approximately 1 hour 45 minutes drive from Boston, this hike can definitely be covered in less than a day. Infact it is a terrific hike offering tremendous rewards for modest efforts.

Recently, we began this hike on a rainy day however we got lucky that it stopped raining just in about 10 minutes. Parking at the trailhead is free. Here is a link for the start of trailhead. It is a great short but not too intense hike making it a great place to start for beginners, hiking with kids, family or anyone looking for a quick workout. It does get a little steep in patches but nothing too over the top making it relatively an easy one. We took approximately 30 minutes to get to the top.

The trail is marked with blue markers making it a well guided trail to reach the top. It is a dog friendly trail for all those looking to hike with your dogs as well as biking friendly. Once you are closer to the summit there is a part which leads you to the road but don’t think you are on the wrong path as if you take the road and follow through the blue markings it will take you to the summit.

The best part about this trail is you do not need to hike to reach it. You can simply drive from the base of Mount Sugarloaf all the way to the top if you are not in the mood to hike, or with small kids, or just looking to have a picnic with friends and family but still want to enjoy the sweeping views. If you decide to drive to the top there is an entry fee of $5 for Massachusetts Residents and of $20 for Non-Massachusetts Residents.

At the summit there are various picnic tables to enjoy a picnic with your family or friends and also grills available. A great place to spend a summer or start of Fall day to soak in breathtaking views and fresh air.

There is a 3 level observation deck at the summit offering 360 degree views by climbing up the spirally steps. The observation deck offers miles of natural beauty spread out below you. However, if you do not wish to climb the tower there are various look out points at the edge too to enjoy the beautiful views.

All in all a great short trail to explore with spectacular views. Highly Recommend it!

Lifestyle

How to Create a DIY Hula Hoop Photo Display

Looking for fun and creative ways to display pictures for your family, birthday parties, bridal showers, maternity display, graduation parties, theme parties, weddings or even as a gift to your friends? I think Hula Hoop Photo Display is a great way to instantly add to the decor while also compiling your favorite memories. I created a beautiful Hula Hoop Photo Display recently for my husbands birthday.

Materials Needed

A Hula Hoop (There are 2 sizes available – I got the slightly smaller one but you can pick any)

White Spray Paint (Any color of your choice. If you are planning to display for your wedding gold would be a great color option too to add some glitz and glam)

White Satin Ribbon

Faux flowers

Faux greenery/leaves

Hot glue Gun

A small wooden Block (Optional – If you want to make it stand)

Pictures (I printed ours using the Printic App)

Scissors

Directions

Step 1: Shortlist the pictures from your phone or social media which you would like to use for creating this beautiful photo display and send them for printing. I got mine printed using the Printic App. All you need to do is select the pictures you want to print and they will pop and print polaroid type pictures for you and send them in your mail. They did a fantastic job and I was extremely happy with the quality. If you want you can even have them edited to a black and white version for a more vintage look on photoshop before getting them printed. You can also print these yourself on Photo Paper if you like too.

Step 2: Next I took my Hula Hoop and wooden block and spray painted it white in a ventilated area. I gave them around 2 to 3 coats to ensure they were completely covered. I also coated them with a topcoat to seal the paint. You may skip this step if you like but I highly recommend it. Set them aside to dry completely. I kept them to dry completely for 24 hours. I did it in the summertime so it dried fairly quickly.

Step 3: Once they have completely dried, I cut 4 satin ribbons measuring the hula hoop and where they will be placed and secured them with a glue gun. If your pictures are fairly smaller than mine you can add a thinner satin ribbon too and add more ribbons to add more pictures. This is completely your choice. I started with cutting and sticking the center ribbon to be as symmetrical as possible.

Step 4: Next, I started to add the faux greenery. I first laid them out to decide how I wanted them by laying the leaves first and adding some faux flowers and faux buds around it. Once I was happy with the arrangement I secured everything with a hot glue gun. You can add as many or ass little of the faux greenery or faux flowers as you like. Remember to add enough hot glue to secure everything in its place.

Step 5: While everything was drying, I started laying the pictures on the satin ribbon until I was happy with the display arrangement and then secured them with a glue gun.

Step 6: Finally, I took the Hula Hoop Photo display and using a hot glue gun stuck it to the wooden block. Remember to hold it for a couple of minutes to give it support until the glue dries and can hold it easily. Ensure to apply enough hot glue in order to secure it in place. If you wish to hang them you can easily hand them too using ribbons and skipping the wooden block.

Hope you enjoy creating your personalized Hula Hoop Photo Display. If you do create one using the directions feel free to share it with me. I will be happy to see what you come up with.

Food, Lifestyle

How we Brewed our Own Beer – Homebrewing

After our trip to Amsterdam and actually visiting some breweries my husband and I were intrigued about someday brewing our own beer however always pushed it back. During the quarantine we finally decided to give it a try and become beer brewers from beer drinkers.

Since we are not experts at it we googled and looked for options and finally decided to order the Craft A Brew Kit from Amazon which had great reviews. We personally like Hefeweizen so got that kit but they definitely offer more options such as Pale Ale, Irish Scout, Brown Ale, IPA, Oktoberfest Ale, Ciders and many more options to pick from depending on your liking.

The kit includes a 1 gallon carboy, thermometer, sanitizer, yeast, hops, dry malt extract, speciality grains, grain steeping bag, airlock, rubber stopper, funnel, transfer tubing, racking cane, a tube clamp and a guide to craft brewing. A good thing about this kit is that all the equipments are reusable if you plan to brew beer again and all you need to get is the ingredients i.e Dry Malt Extract, yeast, speciality grains, hops, yeast, sanitizer and a grain steeping bag.

Additionally you need a large brew pot (link to the brew pot we used), around 10 Lbs of Ice, 10 to 12 Swing top bottles (or 4 big swing top bottles) and a fine mesh strainer (optional but recommended).

The guide to craft brewing included with the kit lists down all the steps in a clear and precise manner making it so easy to brew the beer even for beginners. It was our first time too but the instructions and very explicit and also they have many You Tube videos in case you need more clarity or don’t understand a particular step. Also, if you run into some questions which cannot be answered by viewing the videos you can always reach out to the brewmaster and they respond back with answers.

The Process consists of 6 steps :

Step 1: Brewing – This is the first step and one of the steps where you will spend most of your time. We took around 4 hours to complete this step but had a great time brewing our own beer. The guide has detailed instructions about this step and below are some of the pictures for this step.

Step 3 : Sanitization – This is one of the most important step to brewing and will determine if you get great tasting beer or terrible tasting beer. So be sure to follow this step exactly as stated in the guide.

Step 3 : Fermentation – Once we completed brewing our beer, we filled it in the sanitized carboy and plugged it with a rubber stopper and made a blow off assembly inserting one end of the tube in the rubber stopper and the other end into a half full glass of water. It is essential to store in a dark cool place for the fermentation process to commence. After a few days once the fermentation calms you can use the airlock. This whole process takes around 2 weeks.

Step 4 : Carbonation and Bottling – After 2 weeks of the fermentation process we were looking forward to the bottling process. We used the swing top bottles for this process and yet again sanitization is key to this process. In this process we reactivated the remaining yeast using sugar as fuel to carbonate the beer once bottled. Once that step is done we siphoned the beer from the carboy to a pot using the racking cane, clamp and a tube and then yet again to the bottles from the large pot as per the instructions mentioned in the guide. This process took us about 1.5 hours to complete. I am not going to lie we did get a little curious as to how the beer was tasting and tried a sip before the process of carbonation.We kept the bottled beer back in a warm dark place for another 2 weeks to allow the beer to carbonate and condition.

Step 5: Enjoy – After 2 weeks we got our home-brewed beer ready to drink. We were really happy to see the carbonation process work and the beer tasted absolutely amazing. We went all out and even designed our own Beer Labels and came up with a name for our Beer too. Clearly, we were over excited that the beer turned out so good and all the hard work paid off. We are left with our last Beer bottle now and already planning to brew our next batch by adding a twist to it.

This can be a great date night idea or even a fun activity for a family or friends to do together to spend time bonding with each other while also enjoying the rewards at the end of the brewing process. After all what’s better than a cold beer on a hot summer night ?

I would love to hear about your beer brewing experiences. Feel free to share them with me. Happy Brewing!

Travel

Boston Lights: A Lantern Experience at Franklin Park Zoo

This weekend we decided to visit the Franklin Zoo which unveiled its doors to the Lantern Experience and what a delight it was. As we entered the Zoo we were greeted by an illuminated welcome sign which gave us a little sneak peak into what to expect and let me tell you we were not disappointed. At the entrance they scanned our tickets and let us in. To ensure social distancing at the Zoo and maintaining limited capacities so as to avoid overcrowding it is essential to make online reservations here. They have ticket options available starting at 6.00 pm everyday until 9.30 pm everyday until November 1, 2020.

We made reservations at 9.00 pm allowing us enough time to enjoy the displays as the Zoo shuts its doors at 10.30 pm. We spent a good 1.5 hours enjoying the displays which we found was enough without it being rushed. If you are planning to go with kids I highly recommend going in earlier just so it doesn’t feel rushed and you have enough time just in case the kids decide to spend more time at the interactive displays.

Spanning 72 acres of the Franklin Park Zoo, there were over 50 majestic displays for everyone to enjoy. As we entered we saw interactive displays like the conservation wheel which allows you to spin the wheel to learn about different ways to conserve nature and wildlife, and step on lit tiles that bloom the petals of flowers on the wall display.

As we walked further, we saw the beautiful Asian lantern displays and a 197 foot long dragon breathing fire details bordered with Chinese Zodiac signs as per the birth year. Just at the tail of the dragon there were interactive musical step stars which were quite popular with the kids. We saw so many kids jumping around on the musical step stars and dancing their way out. I am not going to lie I did too. After all doesn’t everyone have a kid inside of them ?

Walking ahead there were various displays of lights as we reached the section displaying Pandas – A huge tall giant Panda, 2 pandas kissing each other. Another Panda display which caught my eye was the gleaming lit colorful tree with Pandas on it.

As we walked ahead we saw displays of giraffe, zebras, elephants, alligators, hippos and a few more displays. But the one which struck my eye the most was the display of twinkling color changing butterflies. It was bright, colorful and so full of life.

Walking ahead under the tunnel of white lanterns that hung above we we saw another display I really enjoyed was the Peacock fanning its spectacular feathers. Everyone stood there peacefully waiting to watch the peacock fans its feathers and the beautiful changing colors. It was a delight watching the Peacock, The National Bird of India in all its glory.

As we walked ahead through the various dazzling lantern displays and luminous flower displays we watched the beautiful color transforming tree. My husband said this tree reminded him of the tree in the Avatar movie (The Tree of Souls).

Passing through the blue Jellyfish display we walked into yet another display which I completely loved. A walk through an illuminated 66 foot long shark tunnel completely caught my eye. It was as though you are walking directly into the mouth of the shark. It was so creative and beautiful.

As we walked ahead we were nearing the end and walked through the Cinderella Carriage, and an interactive giant piano where you could dance your way on the keys making it lit up and play tunes. Definitely brings out the kid inside of you.

These were just a few of the key highlights for me but there is so much more and literally something for everyone. It is a fun one of a kind experience. If you enjoy watching the lights, the wildlife, nature, and cultural traditions this is definitely for you. As a part of the Zoo’s commitment to conservation and preservation they have used energy saving LED lights to create this whole experience.

The whole experience is magical and in parts interactive as well making it absolutely captivating. Highly recommend it to everyone.

Hope you enjoyed reading my post! If you have any questions please feel free to leave a comment or email me and I will be happy to answer them. For all other travel guides and to receive my blog posts subscribe to the blog follow me on Instagram

Travel

Worlds End, Hingham – An Easy and Scenic Trail

World’s End, a 251 acre park and conservation area overlooks the Hingham Bay and Boston Harbor offers several miles of trails with great views to the water and Boston Skyline. Recently, we decided to explore the trails while maintaining Social Distancing. Worlds End is owned and operated by The Trustees of Reservation and they have done a great job at not only preserving the area but also ensuring that there is no overcrowding during the pandemic.

To restrict overcrowding and ensuring safe access for everyone you are required to reserve your spot by booking in advance your day of visit and time of visit. To comply with the rules we reserved our timed entry passes a day in advance. To be honest, I really appreciated this to ensure safe access during these times. It is open from 8.00 am to sunset every day. Entry for members is free but non-members can buy there tickets here.

World End trail is an easy trail suitable for everyone kids and adults alike. Dogs are also allowed on this trail and must be kept on a leash. The trail is accessible all year round and is great for a stroll with great views, running, picnics, cyclists, bird watching, horseback riding, cross country skiing adventures and photography. The park is cut with carriage style roads which add an old world feel to it. It is a great place for engagement, wedding, new born photo shoot, or even maternity photo shoots. The best part about it is it offers views of the forest, ocean and Boston Skyline all at the same time. Isn’t that a perfect package? I think around Sunset would be a great time to capture these moments.

The trails are clearly marked and there are maps placed occasionally around the trail. There are several spots to relax around in the shade with the sound of nature and may be even a book or your favorite music. It is a perfect spot for boaters, paddlers, kayakers to enjoy the good summer days.

While you can explore it yourself occasionally there are also various activities and events organized by The Trustees of Reservation. Here is a link for the upcoming events at Worlds End you can explore.

All in all a great way to spend a summer day and soak in the great views of the Boston Skyline. Happy Exploring!