
Jewelry Trays are so fun and colorful to create using Sculpey and a fun way to add a pop of color to your wardrobe. From solid colors, to interesting patterns, different shapes and more, the possibilities are endless. Here are a few tips I would like to share with you to create a jewelry tray in no time. Seriously, its fun, useful, easy and addictive!
Materials Needed:

- Sculpey soft clay
- Clay Roller/ Rolling pin
- Butter Knife
- Cookie/Clay cutters – Different shapes (not necessary – made this one without any cutters)
- Thick paper or Ceramic tile (to keep your work space clean)
Step1: Working on the ceramic tile or thick white paper, roll your sculpted clay using your hands to form thin ropes of all the different colors you want to use.

Step 2: Twist all the ropes together interlacing the colors into one large rope.

Step3: Continue to twist and turn the rope and fold on top of itself, mixing and swirling the colors together.


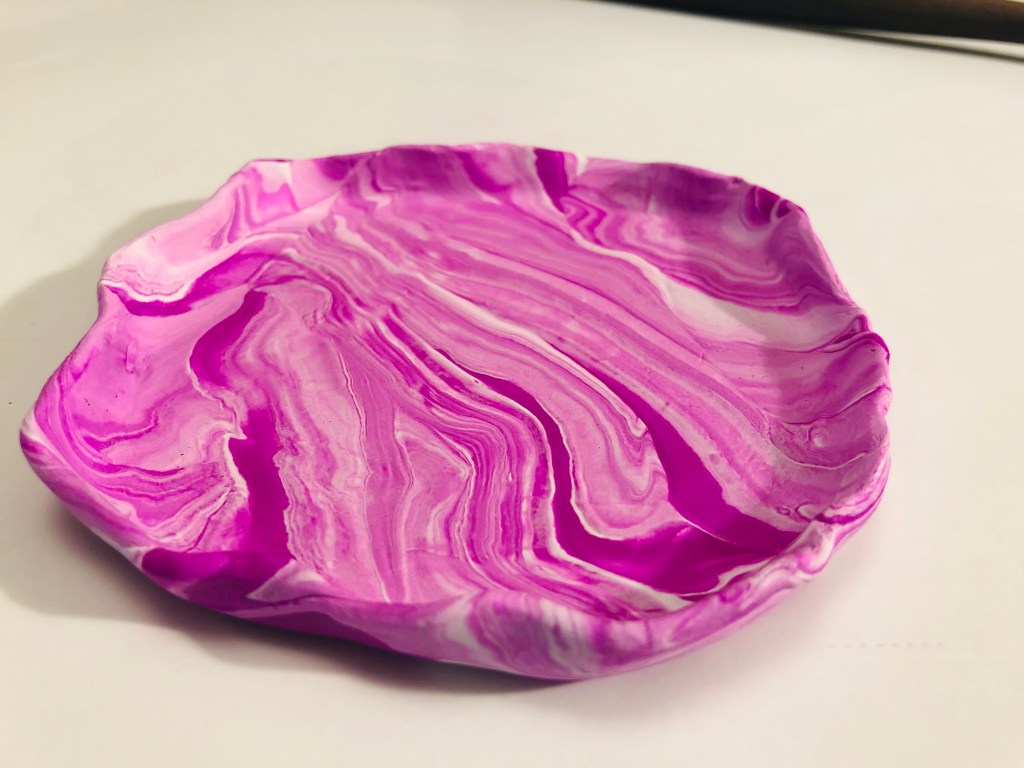
Step 4: Using your hands, make the rope in the shape of a ball and flatten the ball using a rolling pin. Avoid it being too thin or too thick; you will want to get it to about the thickness of a quarter. I selected a mix of 2 colors here but you can mix and match as many colors you like or use only one solid color. I used a piece of white and a piece of violet.

Step 4: If you want to make the shape more natural like me just use your hands to give it the shape you like or use clay/cookie cutters to give it any shape you like. You can also use a bowl to give it a round shape.
Step 5: Preheat the oven to 275 degrees Fahrenheit . Transfer your tray on a parchment paper, and bake it for 15 mins for a tray having thickness of a quarter inch. If your tray thickness is more it will be needed to be baked for longer. Follow the instructions on the clay you are using for baking instructions. If you feel the clay does not fold the shape you can even put the tray over an oven safe bowl and put it to bake.

Step 6: Let the tray cool. Once completely cool, paint the rim for detail or leave it as it is. Place your favorite jewelry inside.
These trays are so easy to make and can be made in various shapes, colors and styles. They also make a great gift to give to your friends or simply enjoy yourself. I can’t wait to see what you come up with!

