
A gallery wall lets you tell your story and is a fun way to add to the decor of the house. I have always wanted to add a personal touch to my home with pieces we collected over time but renting does not always make it easy. I have always liked the place to be more inviting and cozy and not be an eyesore. I couldn’t think of a better way than a gallery wall to do all that. Sharing a few tips with you for getting the gallery wall look.
Firstly, I would suggest to get some craft paper from any local arts and crafts store and trace any frame you wish to use on the craft paper and cut it to size. This really comes in handy so that your gallery wall looks like you envisioned, you have even gaps between your pieces and your pieces are not crooked or crammed.
I cannot stress this more but do not be in a hurry to create a gallery wall. Carefully curate pieces of art that matter and appeal to you or tell your story to give it a personal touch. They can be a mix of photos, art prints, mirrors, postcards from your favorite vacations, gifts you have received which matter to you, drawings, wall planters, love letters, license plates, antiques, medallions, writing pads, dates or numbers that have a special meaning, baskets or platters and plates, your first house keys, etc. The opportunities to get creative are endless.
Now lets get started:
- Move any furniture to the side for the wall you plan to use to put up the gallery wall so that you have enough space to hang your pieces freely.
- If you are moving any furniture make sure that you mark the area using the painters tape so that you are aware about the space you have to work with.
- Lay your art work on the floor and play around with the colors and layout till you are happy with it. A tip would be to anchor your favorite or biggest art in the centre and then slowly work the other artwork around it. Do not be afraid to try out different layouts as there are no real guidelines or rules to create a fun gallery wall.
- Remember that is it not necessary to have all your artwork in the same color palette however a tip would be to tie it in with the color scheme of your house or room you are doing it in so that they compliment each other.
- Once you have the art work you like, using the painters tape apply the craft paper on the wall and step back and view it from various areas in your room. Check that the sizes of the pieces balance each other out well and make any small adjustments that are needed.
- Hang your pieces and remove the tape once you are done. If you are living in a rented space like me you can use Command strips to stick your artwork to the wall without damaging the wall. Move your furniture back into its place, and you are done!

Things I Used for My Gallery Wall
1) Writing Paper Clip . I got it from Staples and it cost me around $5 for the A4 size.
2) Our First car and State’s License Plate
3) Our First Anniversary Dinner Menu – I got it framed from a local framer here (Frugal Framers) and it cost me $30.
4) A fun Caricature from our trip – I got it framed from a local framer here (Frugal Framers) and it cost me $45.
5) Life is a Beautiful Ride with LED Lights frame.I purchased this frame from A.C.Moore for less than $20.
6) A Poem my husband wrote and gave me on my first birthday with him – I printed the poem on the special paper of my liking and clipped it on the writing paper clip I purchased from Staples.
7) Love Frame. I purchased this frame from A.C.Moore for less than $20.
8) A Vintage looking mirror with the quote – Every Love Story is beautiful, But ours is my favorite. I purchased this frame from Cost Plus World Market for $30. Here is a link of the same.
9) Pictures of our Personal memories – Pre Wedding Celebrations in Mumbai, India (Where our Journey began), of our Honeymoon in New Zealand and of Snowy Chicago, our first home.
I used bayphoto.com to get these pictures printed and loved the quality and the final pictures. I printed the 3 pictures for around $100 as I got a 25% discount on my first order.
The best part about Gallery walls is you can add pieces or take away pieces as you go on to make them relevant to your life. So get creative and have fun creating your own gallery wall.
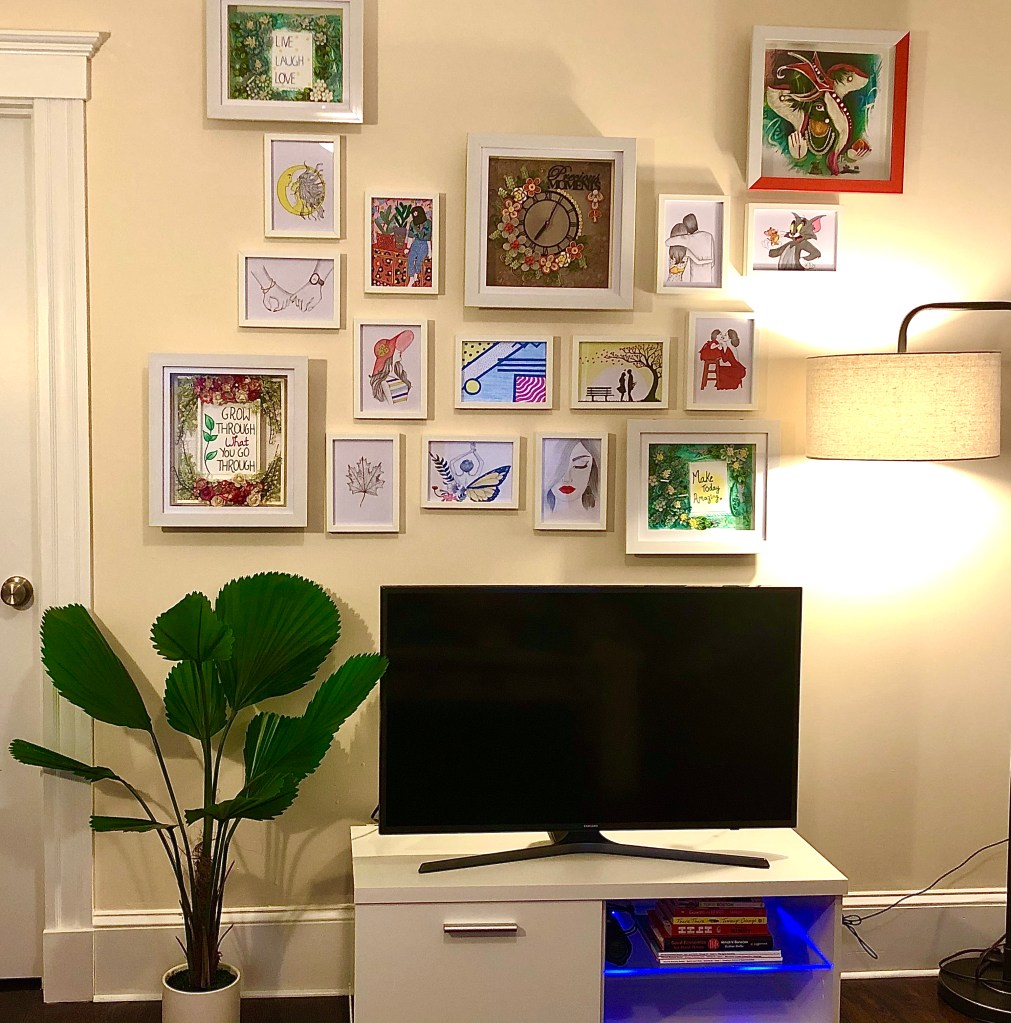
Here is a picture of another Gallery Wall I recently created!


This was great to readd
LikeLiked by 1 person